- What are the basics of Quizzes and Exams?
- Create a Quiz
- How to Provide Special Accommodations for Students
- How can I import quiz questions from a Word document?
- How do I use the Question Library?
- Can I turn off spell-checking for quizzes?
- How do I add an image to a quiz question?
- What does it mean when a quiz is In-Progress?
- Can I fix a faulty question after students have taken the quiz?
- Can I make a copy of an old quiz available for students to review?
- How do I download quiz statistics and reports?
- How do students see quiz results?
- Can a quiz be printed from Pilot?
- Why Don't I See the Question Marks in the Question Library Anymore?
- How do I provide individualized quiz feedback to the students during grading and what do they see?
What are the basics of Quizzes and Exams?
The Quizzes & Exams tool enables you to create and manage points-measured assessments. You can create and manage quiz questions from the Question Library or the Quizzes & Exams tool, and organize quizzes into categories to make it easier to find assessments with similar or related content. The quiz preview option allows you to test the accuracy of content and grading before you release a quiz. In a preview, you can answer the questions, view allowed hints, submit the quiz, auto-grade answers, read feedback, and view report results.
Creating quizzes for your course involves two basic steps. Each of these steps is described in greater detail in related sections. The basic steps are
-
Create your quiz questions. You can create questions in either the Question Library or by importing them from Respondus, a quizF generating software package.
-
Create a quiz. Create a quiz by defining a quiz name and general properties, establishing the quiz restrictions, setting the quiz attempts, creating the submission views and quiz reports, populating the quiz with questions, and setting up the quiz layout.
List of Videos in Playlist
To see individual videos in this playlist,
- click the icon in the top left corner of the video or…
- go to the YouTube Playlist page for the Quizzes.
Create a Quiz
Creating quizzes for your course involves two basic steps. Each of these steps is described in greater detail below. The basic steps are:
- Create a quiz. Create a quiz by defining a quiz name and general properties, establishing the quiz restrictions, setting the quiz attempts, creating the submission views and quiz reports, populating the quiz with questions, and setting up the quiz layout.
- Create your quiz questions. You can create questions in either the Question Library (recommended) or within the quiz. You can also import properly formatted questions from Respondus, a quiz generating software package.
Common Features Among All Quiz Question Types
The following features apply to all question types in the quizzes tool:
- All question types have an optional Title field. If you do not enter a title, the system will take the full question text and enter it as the title. The title is only displayed in the quiz tool and not to users taking the quiz.
- All question types give the option of indicating a Difficulty level. Difficulty levels do not display to the students, but they provide an opportunity to sort questions, regardless of type, by a difficulty level.
- Many question types give you the option of inserting an image. Click the Insert an Image button to insert an image.
- All question types provide an opportunity to enter feedback information and question hints.
- All question types offer a Preview.
- Once a question is created, click Save to save the question and return to the main page; Save and Copy to save the question and create a new question of the same type that retains the copied properties; or, click Save and New to continue creating questions of the same type.
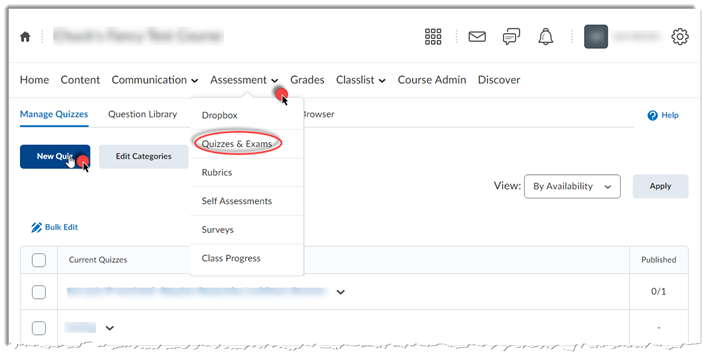
From the Navbar, click on Assessment and then Quizzes & Exams. When it shows, click New Quiz.
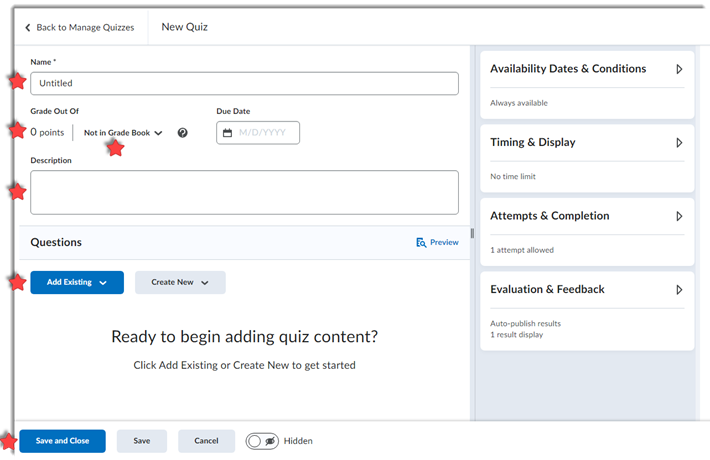
When the new quiz page appears, enter a quiz Name, determine if it should be in the gradebook, enter point value, determine if it needs a description, add questions, set dates, timing and other options, and Save.
Add Questions
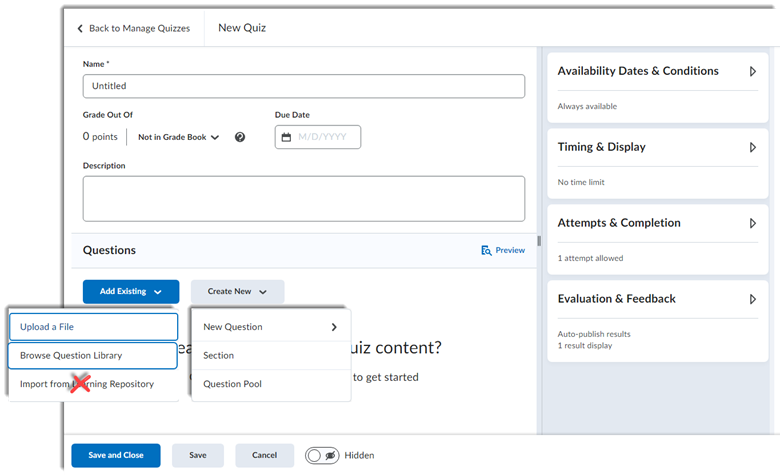
There are several ways to add questions to your quizzes.
- Browse Question Library: Pick existing questions from the Question Library
- New Question: Create new questions in a variety of types using “New Question”
- Create a Section or Question Pool
Browse Question Library
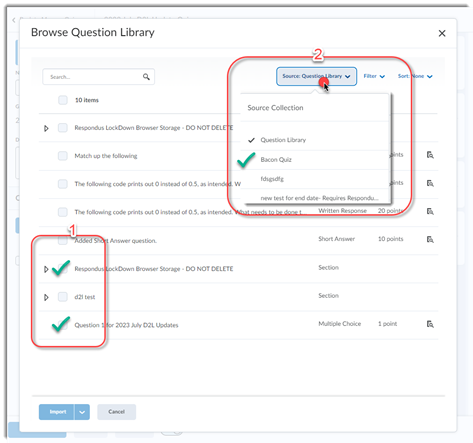
In the quiz question area, click Add Existing and select Browse Question Library.
- You can check mark individual questions or sections from the library. Or—
- You can click the blue source button and select from specific quizzes.
New Questions
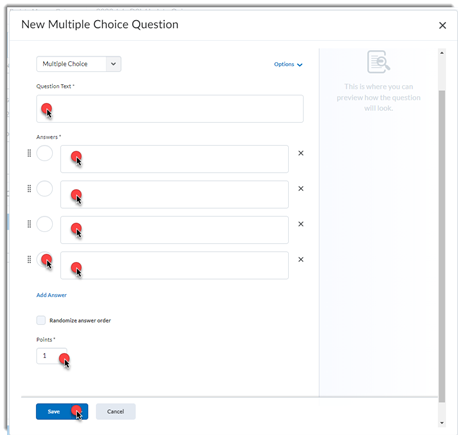
From the Create New drop menu in the quiz, select New Question and Multiple Choice.

In the New Question pop-up, fill in the question text, fill in the answer options, select the correct answer, add points to the question, and Save.
Additionally, you could decide to randomize the answer order for the question. This would cause learners to have a variety of answer orders and this lends to academic integrity.
*Learn more about adding a rubric to to a specific quiz question.*
Add a Section to a quiz
What is a Section? As it relates to quizzes, a Section is a premade bundle of questions found in the questions Library.
Create a Section
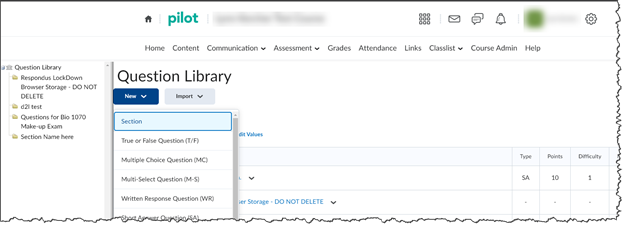
Navigate to Assessment, Quizzes & Exams, Question Library, then click New and Section.
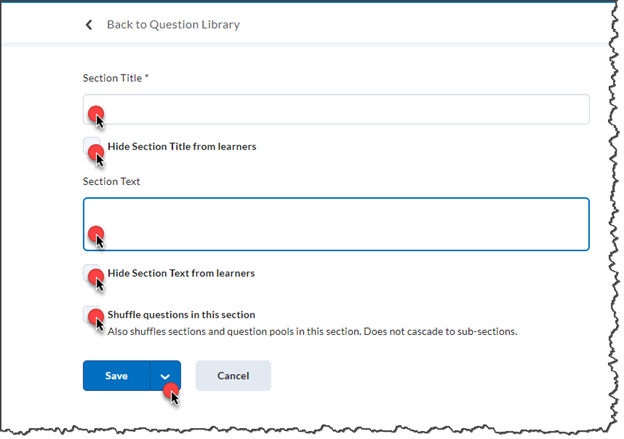
Title the section and determine if the section title and text will be hidden, as well as whether the questions will be shuffled. Click Save.
Add questions to a Section
From Assessment > Quizzes & Exams, click on Question Library.
Select the questions you want to move into the section and click Move.
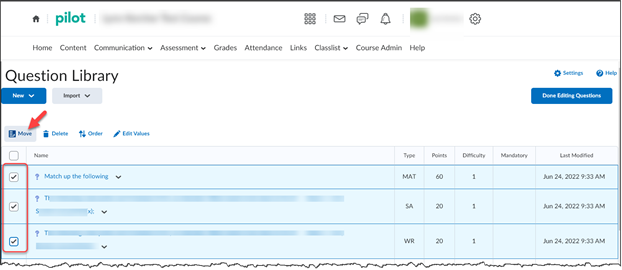
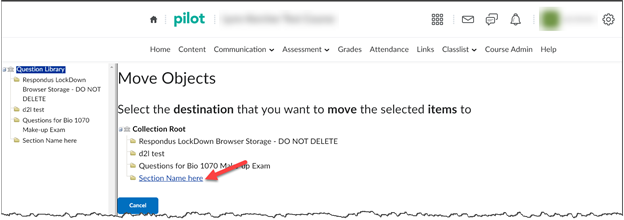
Click the destination folder.
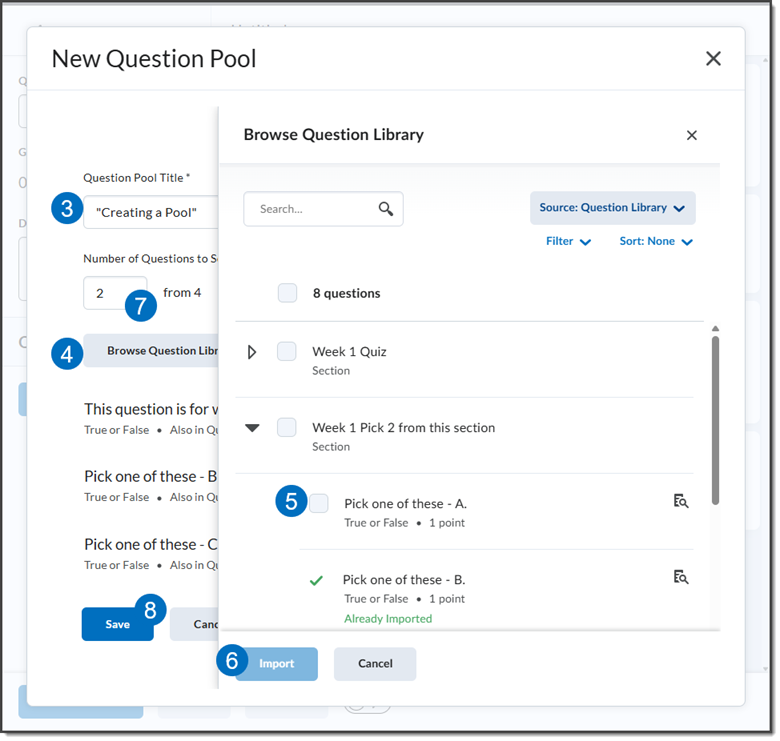
Add a Question Pool
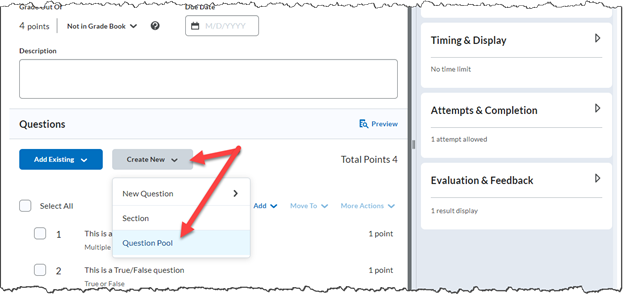
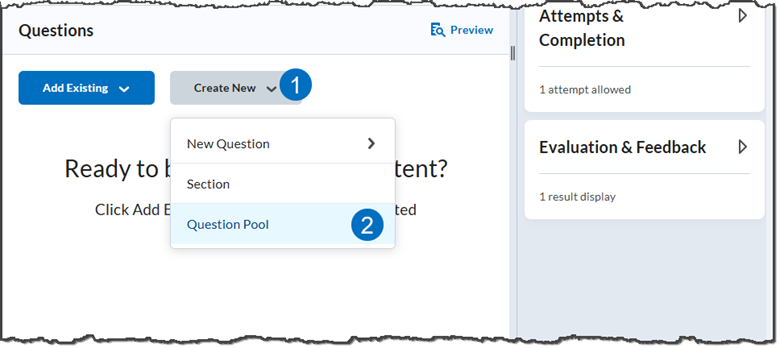
From the Quiz, click Create New then Question Pool.
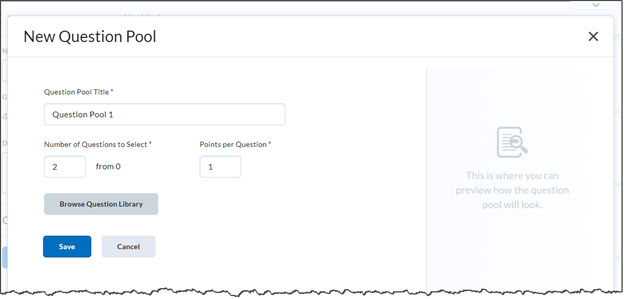
Title the Pool, determine the number of questions to be used from the pool, points per question, and select Browse Question Library.
In the pop-up, select questions from the available list, or choose a source from the drop menu. When you have selected the questions, click Import.
Restrictions
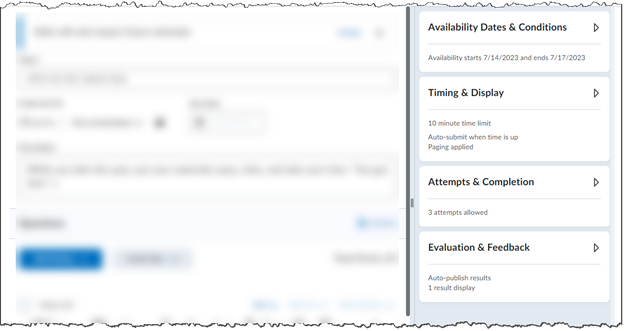
Availability Dates and Conditions:
In this section, you can set Start and End dates and manage Special access.
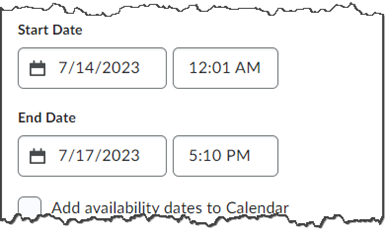
Start and End dates
These dates display the dates and times during which the learner can start the quiz. Once started, even if just with one minute remaining in availability time, they have the indicated time in the time limit to complete the exam.
Manage Special Access
This allows you to set up non-standard access to the course providing additional time or restricting viewing for certain learners.
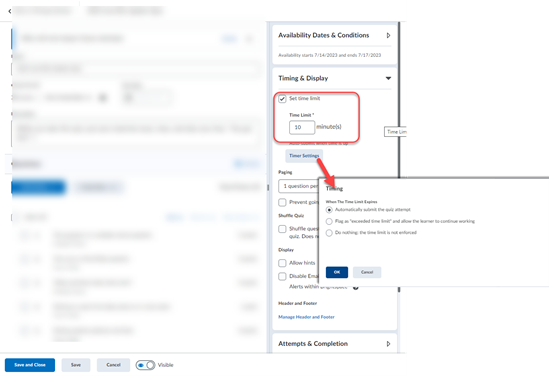
Timing & Display
In this section, you can set the time limit for taking the quiz, determine the number of questions per page, as well as a few other helpful settings.
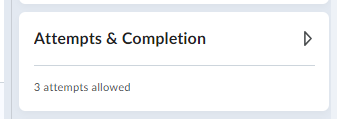
Attempts & Completion
This is where you manage the number of attempts the learner has to complete the quiz.
Evaluation and Feedback
In this section, you determine what the learner sees after they complete their quiz.
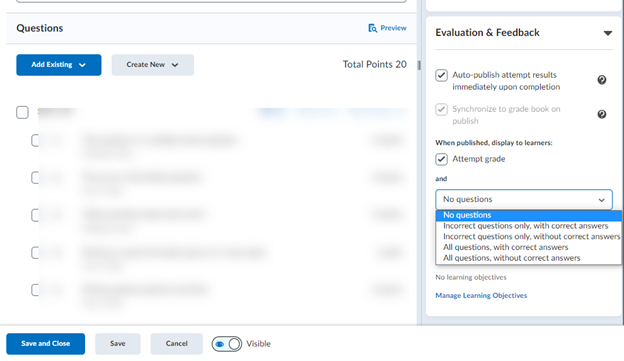
Auto-publish attempt results immediately upon completion will determine if their results are put in a Published status.
Synchronize to grade book determines if the grade gets populated in the grade book once published.
When published, display to learners: In this section, you determine if they see their grade as well as any of the quiz questions and answers when they submit.
How to Provide Special Accommodations for Students
Special Accommodations, a.k.a. "Special Access," allows you to provide a student with additional time and/or attempts to complete a quiz.
Special Accommodations can be set at either the course level (one set up will account for all quizzes) or at the individual quiz level.
At the Course Level
To set Special Accommodations at the Course Level, view the instructional video below or the written instructions to follow:
-
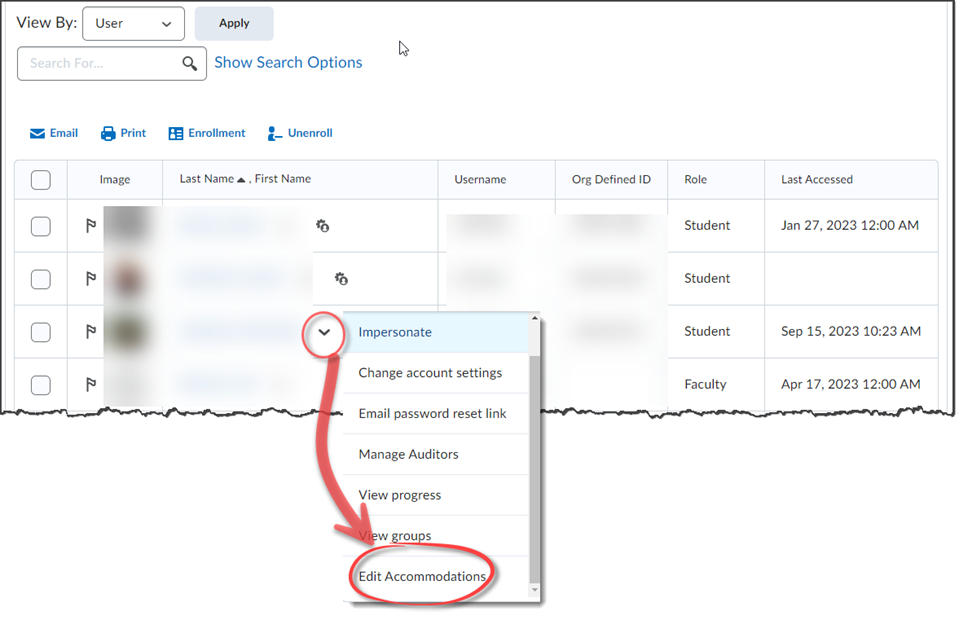
From the Navbar, click Classlist and then Classlist again.
-
Next to the student's name, if you see a gear/peoplehead, you know they already have course level accommodations. If you do not see that, click the action arrow next to their name and select Edit Accommodations.
-
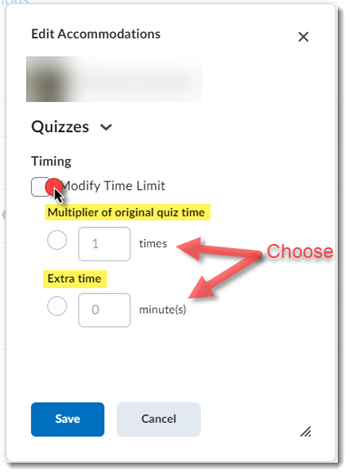
In the pop-up, select Modify Time Limit, select either "Multiplier of original quiz time" or "Extra Time." Then fill in the appropriate amount and click Save.
-
You will see the gear/peoplehead added next to that person's name.
Please Note: A typical accommodation request for O.D.S. is 1.5 times the original quiz time.
At the Individual Quiz Level
To set Special Accommodations at the Individual Quiz Level, view the instructional video below or the written instructions to follow:
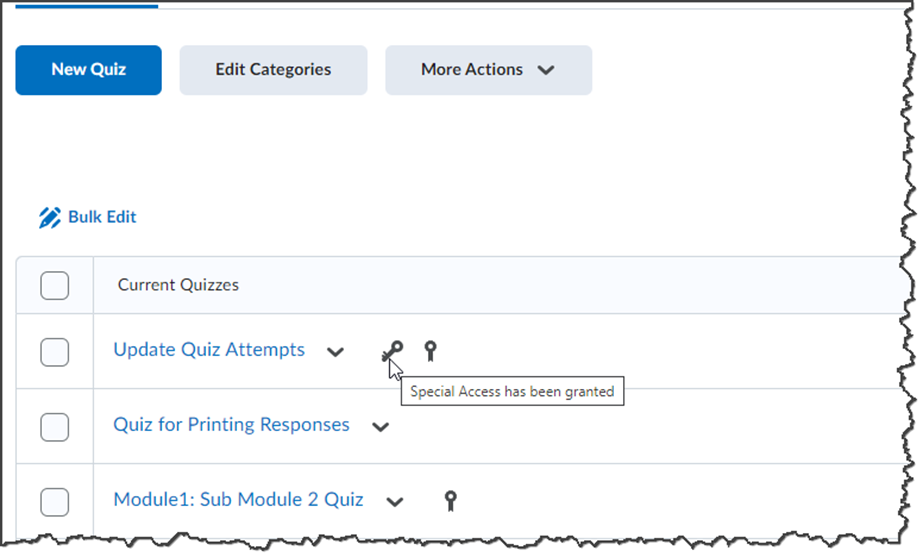
If you see the Key icon next to an individual quiz, you know special accommodations has been granted to someone.
-
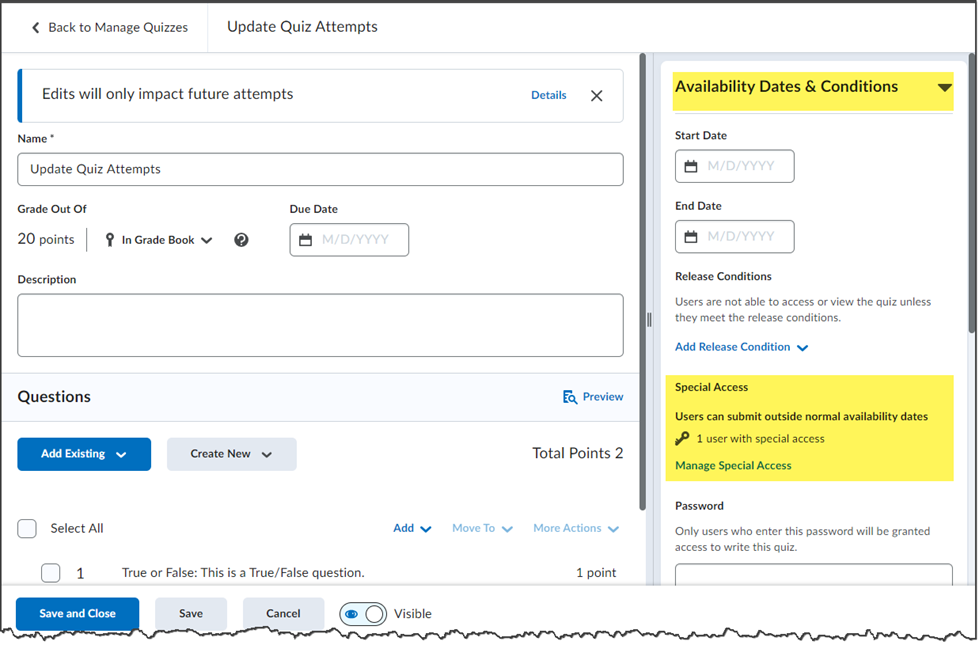
Click on the individual quiz to enter "Edit Mode."
-
Find Special Access under Availability Dates & Conditions. Click the Manage Special Access link.
-
In the pop-up, there are two options.
- Allow selected users special access to this quiz.
This is typically what you want to select. All students will have access, but you are granting specific users "special access." - Allow only users with special access to see this quiz:
This will deny all students visibility to the quiz EXCEPT those selected.
NOTE: If you've set special access and find that students can NOT see the quiz, check this. This is the most common mistake made when setting special access.
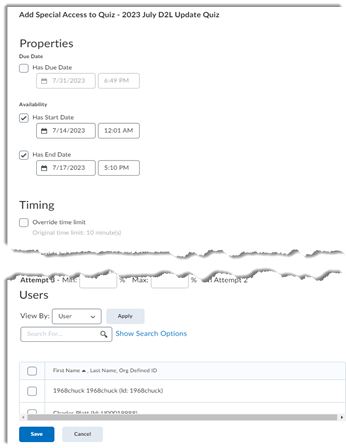
Select the first option and then click "Add Users to Special Access."
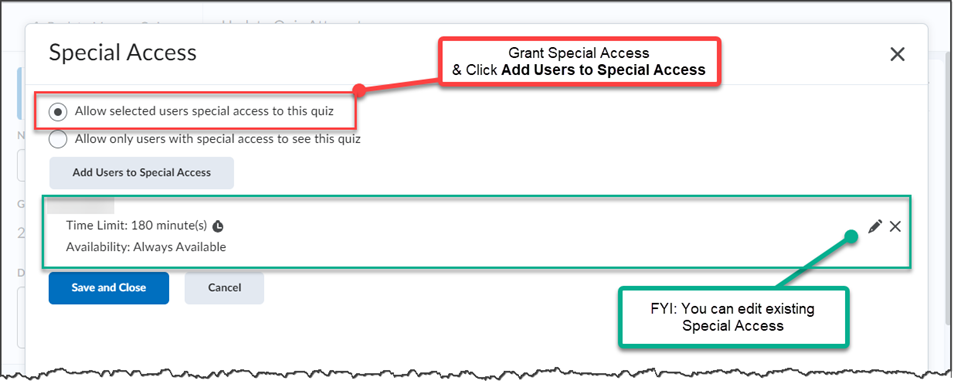
- Allow selected users special access to this quiz.
-
On the next screen, set the special access properties (e.g., due date, Availability Dates/times, Timing restrictions, Attempts allowed, etc.). Scroll down and select the student(s) you want to have the special access.
-
Click “Save” several time until you get back out to the main page. The exam will now be available to the selected student at the selected date and time.
How can I import quiz questions from a Word document?
D2L has a great tool that will do this. It’s called the Q.Q.C. (Quiz Question Converter.) It is not native to Pilot but can easily be added to your Pilot course. We’re happy to add it for you (Step One). Just let us know at helpdesk@wright.edu. That will take care of the first step. Then you can do Step Two and Step Three yourself.
There is a three-step process.
- Uploading the D2L Quiz Question Converter (Q.Q.C.) to your course.
- Formatting and copying your document questions into the QQC.
- Uploading the results of the QQC to your test.
Let's get started.
Step One: Upload the Quiz Question Converter
If you choose to do this part yourself,
- Begin by downloading D2L QQC. [Use this link to download] It is already in the appropriate "Brightspace package" format.
- Then upload it to the course by using the Import/Export/Copy Components function.
- Select Import Components and "from a course package."
- Click Start
- Into the pop-up, drop the downloaded QQC and click Import All Components.
- When the process is done, a new (hidden) module containing the QQC is created.
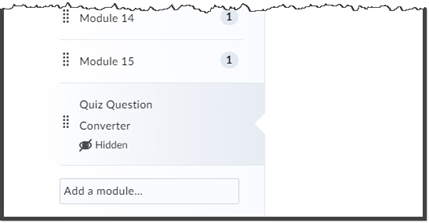
- You can see the converter by clicking on the link.

NOTE: If you are uncomfortable with the Import/Export/Copy Component process, feel free to notify helpdesk@wright.edu. They will create a ticket for the ITS team. We'll help you get that done.
Step Two: Format and copy your document questions into the QQC
Whether you are using Word or Excel for your quiz, there are a few key formatting rules to follow.
For more advanced needs, view the Question Formatting Instructions found in the QQC.
For your typical multiple-choice questions:
- Put the question on a single line.
- If you want to randomize the questions in the quiz do NOT number them in your document.
- Use one line per answer.
- Indicate the correct answer with an asterisk at the beginning of the answer
- Include one empty line/space between the each question/answer set
Once you have your Word or Excel file formatted correctly, copy the text of the document and paste it into the QQC.
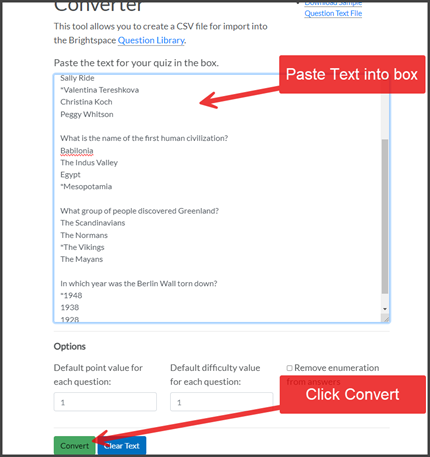
Once it's done, you will see notification that it's done and the CSV file will be in your downloads folder.
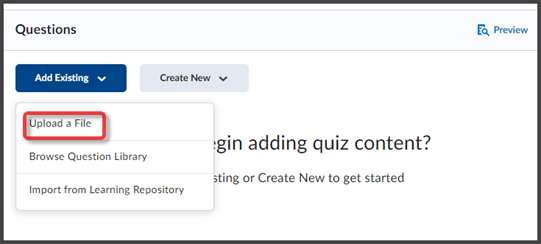
Step Three: Upload the file to your quiz
- In the quiz click the Add Existing button and select Upload a File.
-
Drag the completed quiz CSV file into the drag-and-drop box, or browse to find the file. Once the upload is complete, click Import All.
You will see all the questions drop into your quiz.
How do I use the Question Library?
The Question Library is a repository of questions created individually or in sections. Here we'll show you how to access the library, organize it, import existing quiz questions, and use those questions from the library in a quiz. You are also able to create questions from within the library, using the same instructions you would use to create questions within a quiz.
Best Practice
As a best practice for storage, organization, and easy access, we recommend that you create all your questions using the Question Library. You can also consolidate questions created within the Quizzes, Surveys, and Self Assessments tools by importing them back into the Question Library.
Access it
To access the Question Library,
- Go to Assessments --> Quizzes and Exams.
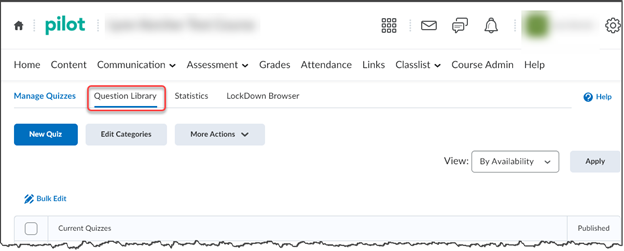
- Click on Question Library.
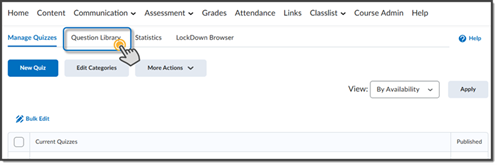
From here you can organize your question library into Sections, Create Questions, and Import questions from a quiz you’ve already created.
Create Sections
You can create Sections (folders) to keep questions organized in folders. This example shows a question library with many sections.
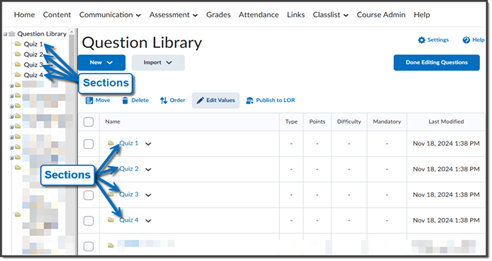
- From the Navbar, select Assessment and then Quizzes & Exams.
- Select the Question Library tab.
- Click New and then Section.
*Here you'll give the section a title, add descriptive text, determine if you want these visible or hidden during the quiz, determine if you want to use the shuffle option, and then save. You can edit the section information by selecting the action arrow for that section and clicking "Edit."
For more information, watch the video below:
Import Your Quiz Questions to the Question Library
This means importing current quiz questions directly into the Library. You must have already created a quiz to do this.
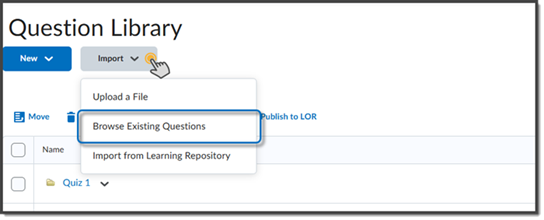
- Go to the Question Library and click Import.
- Select Browse Existing Question.
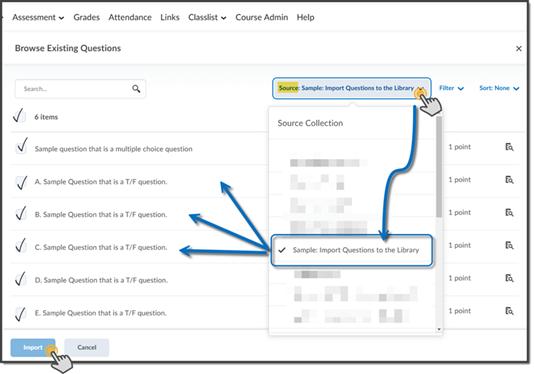
- Using the Source action arrow, select the appropriate quiz that contains the questions you want to pull into the Library.
- Then, select any or all of the questions you want to use.
- Then click Import.
A copy of those questions can now be found directly in the question library.
Add questions to a Section
- On the Quizzes page, click the Section.
- Here you have the option to import questions or create new questions. For this exercise, we'll create new ones.
- Click New.
- Create the question.
- Click Save or Save and New.
Use questions from the library in a quiz
- From the quiz, click Add Existing and then Browse Question Library.

- Then, do any combination of these actions to pull in questions, then click Import.
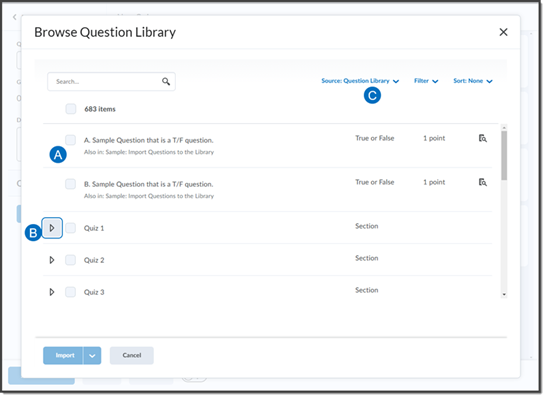
- Select questions directly from the library, or
- Scroll to find a quiz, expand it and select questions, or
- Use the Source action arrow to find a quiz and select from it.
Import Quiz Questions from another course
If you have quizzes or quiz questions you've used previously in a different course and would like to import them from that course into this course, you'll use the "Import/Export/Copy Components" function, which can be found by going to Course Admin in the Navbar.
Click this link for instructions on how to use the Import/Export/Copy Components function
Create a Pool of Questions
While this isn’t done in the Question Library, it is often associated with other questions about the Question Library.
Question Pools are groups of questions in a quiz that allows you to provide the questions and determine how many of them will be presented to the student, and determine if they are shuffled.
From the Quiz Edit page,
- click Create New,
- Then click Question Pool.
- Title the Pool.
- Click Browse Question Library.
- Select the section or specific questions you want to be available in the pool.
- Click Import.
- Determine the number of questions from the pool that should be presented to the learner.
- Add more questions or Save.
- When you are finished, Save and Close.
Can I turn off spell-checking for quizzes?
This page is for people with administrator access.
You must have administrator access to turn off spell checking for quizzes in a course.
-
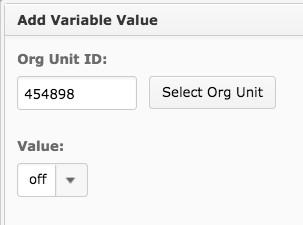
Gear > Config Variable Browser > Tools > Quizzing > ShowSpellCheckInAttempts > Add Value
For “Org Unit ID,” use the number that appears in the course URL. (CRN won’t work.) If you don’t know the ID number, you can click “Select Org Unit” to search by course name.
Change the value to “off” and save.
How do I add an image to a quiz question?
Start with an image in png, jpg, or gif format.
-
From the question Library (you can also create questions directly in the quiz), click “New” and select the type of question (e.g., Multiple Choice).
Click the entry box in the question editor and enter the question. To insert the image, click the image icon
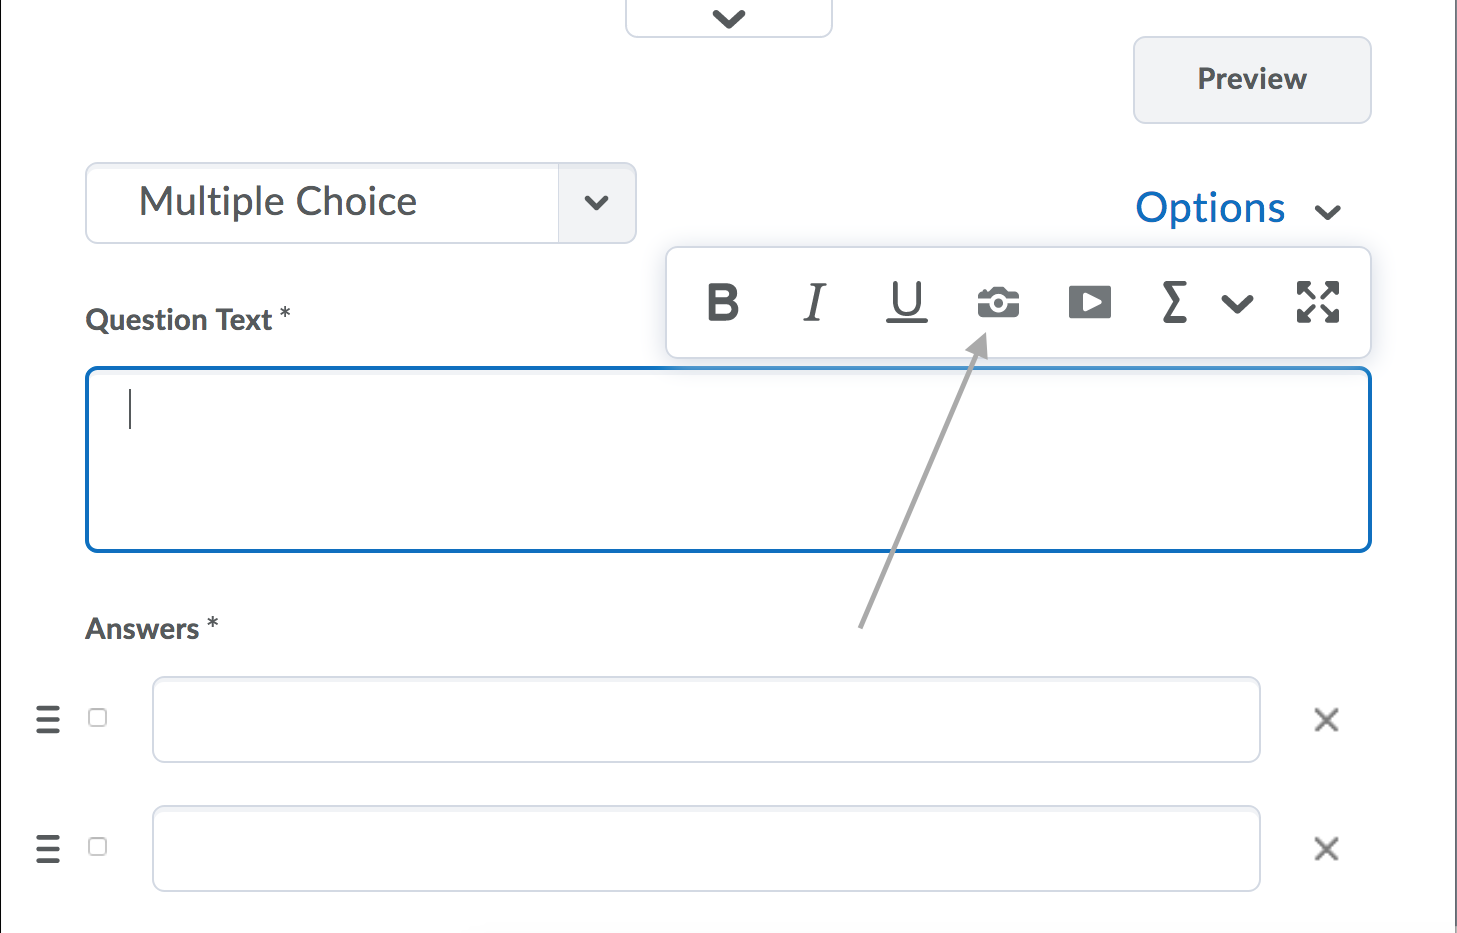
-
Once the image is added, enter the answer options and check the box to the left of the correct answer and click “Save.”
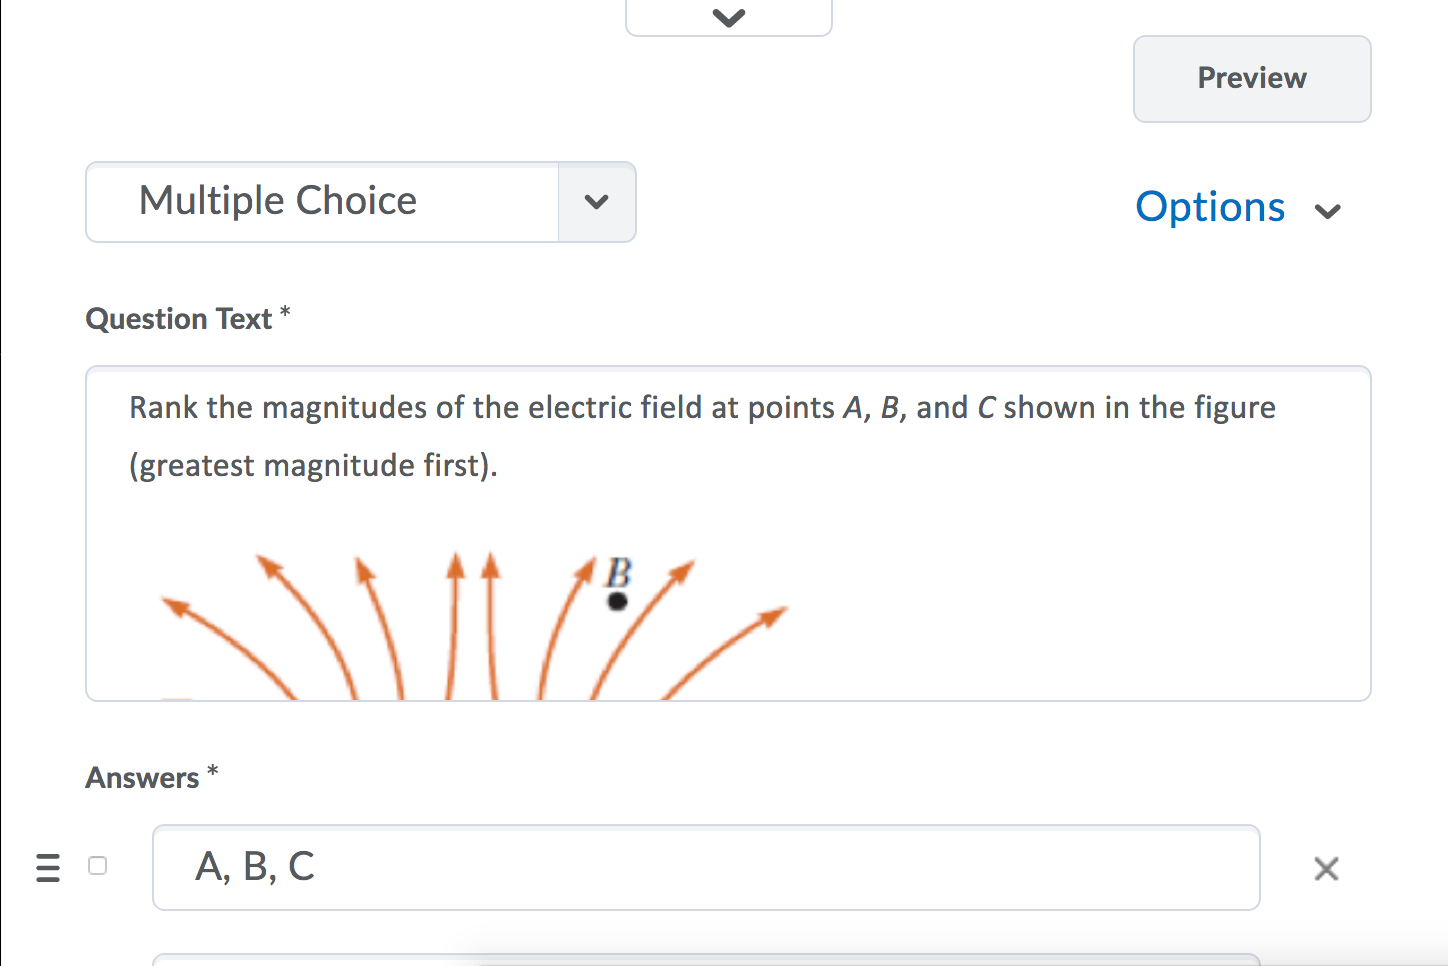
-
Click “Preview” to view the completed question.
What does it mean when a quiz is In-Progress?
If students experience difficulty in submitting a quiz in Pilot, then the instructor may need to submit or reset the attempt for them.
Here are the steps:
-
From the course homepage, click on Assessments and then on Quizzes and Exams. This will display the list of tests in the course.
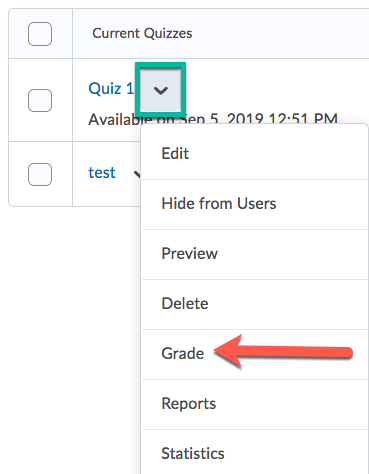
-
Click on the down arrow to the right of the quiz title you want to view and select Grade from the menu that appears.
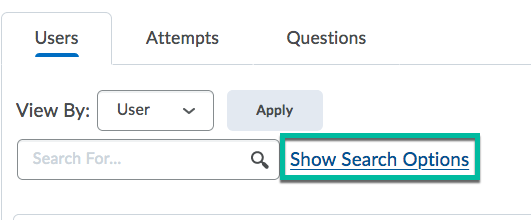
-
A list of attempts will display and you need to click on “Show Search Options.
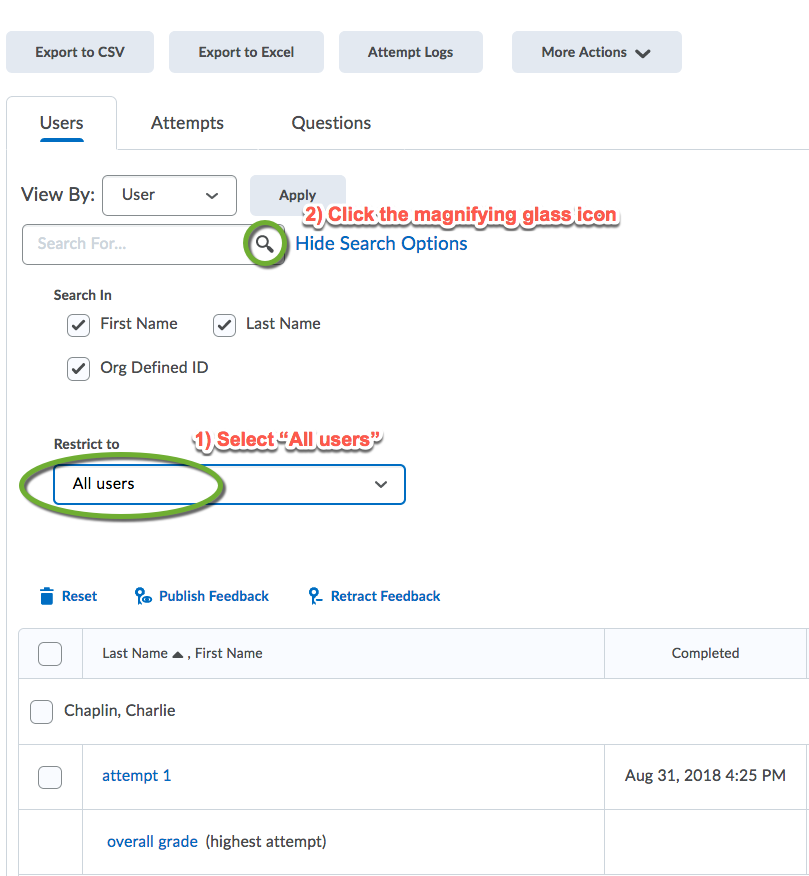
-
When the search options appear, change the “Restrict to” view to “All Users” from the pull-down menu. To refresh the list, click on the Search icon, the one shaped like a little blue magnifying glass (leave the search field blank).
-
When the list of all attempts displays, you will see if the student has an attempt “In Progress.”
Manual insert image: http://blogs.wright.edu/learn/pilotrci/files/2013/03/oie_oie_trim_image…
-
If it is in progress, you can impersonate the account to submit the exam by clicking on the impersonate icon or you can click the checkbox to the left of the name and click the trash can icon at the top or bottom of the page to reset the attempt.

Can I fix a faulty question after students have taken the quiz?
Key Points
- If you alter a question in a quiz that some students have already taken, Pilot will preserve the old version of the question for those students who took the quiz before the change.
- Only students who take the quiz after you edit a question will see the edited version of the question.
- You can reassign points for those who answered the original question. Follow the steps below in the section called Fix the Grades.
How Pilot Handles an Edited Question
When you change a question after some students have already submitted a quiz, the results may seem a little mysterious. In this section, we’ll try to explain Pilot’s behavior. Feel free to skip this explanation and go straight to the next section called Fix the Grades.
When you discover a mistake in your quiz, your first impulse may be to fix the question. That’s perfect. If you’ve marked the wrong answer right, for example, just delete the “100 percent” from the wrong answer and add it to the right answer.
One would think that Pilot should then give credit where credit is due. But this is where things get mysterious.
When you look at your students’ attempts, there’s a scary red message above the changed question. It’s an older version of the question, the message says. You thought you had fixed the question. But inside each student’s attempt, the question hasn’t changed, nor has the student’s score. What gives?
One benefit of the way Pilot handles altered questions is that it helps keep people honest. No one can claim you pulled a switcheroo and altered questions after students answered them. You couldn’t do that if you tried.
There’s an even better benefit, though. Suppose the first students to take your quiz point out that you made a royal mess of one of your questions. So you want to rewrite it before anyone else takes it. You can do that. And you won’t have to worry about how students’ existing answers match the new wording. You can edit until it’s a whole new question with whole new answers if you want.
Students who take the quiz after you fix the question will get the updated version. Students who took the quiz earlier won’t have their attempt altered. When they, or you, view their submission, Pilot will still show the questions and answers as they were when they took the quiz. In other words, Pilot preserves the integrity of prior submissions.
So it’s only for students who submitted quizzes before you altered the question that you will see the red message about the question being an older version.
That leaves one thing that needs to be fixed: grades for students who took the quiz before you changed the question.
Fix the Grades
Because Pilot preserves the integrity of quizzes already taken, it won’t automatically alter the scores of students who took a quiz before you fixed a question. But it does give you a way to fix the scoring yourself.
You may choose to give everyone who took the old version of the question full credit, for example. Or you may choose to give points only to those who selected a particular answer in the old version of the question. Here’s how.
-
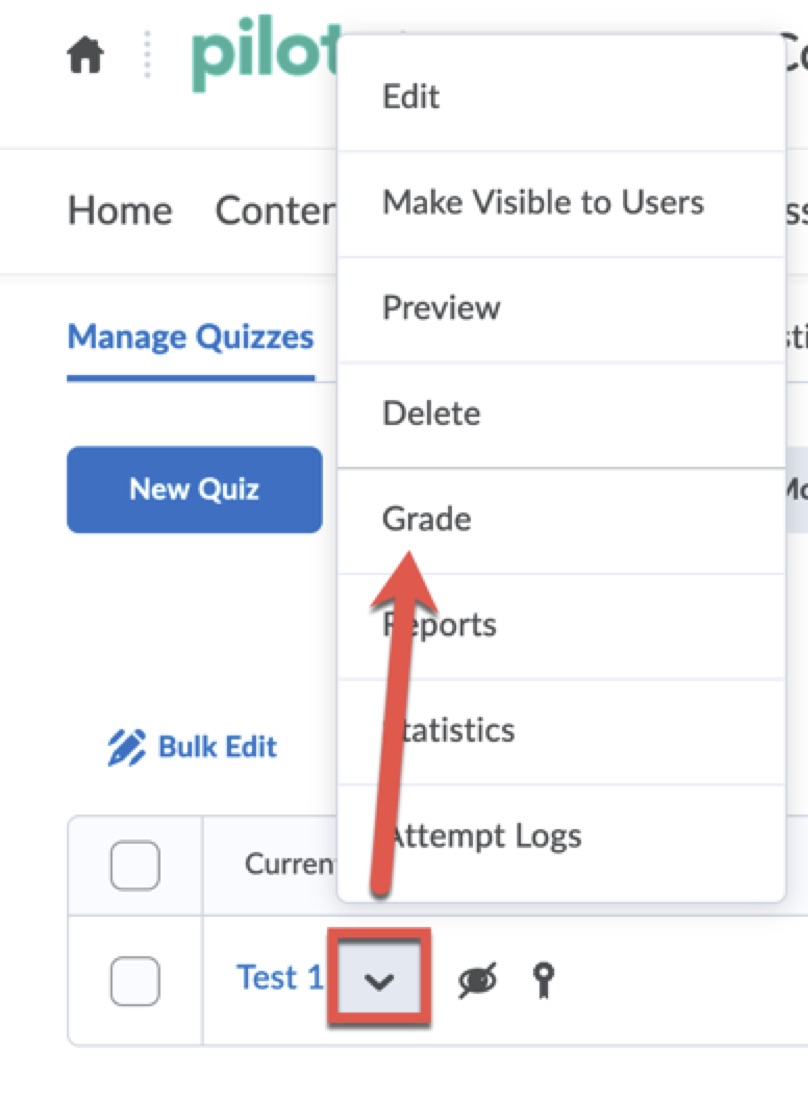
From “Assessment” on the navbar, choose “Quizzes and Exams.”
-
Click the arrow next to the name of the quiz and choose “Grade.”
-
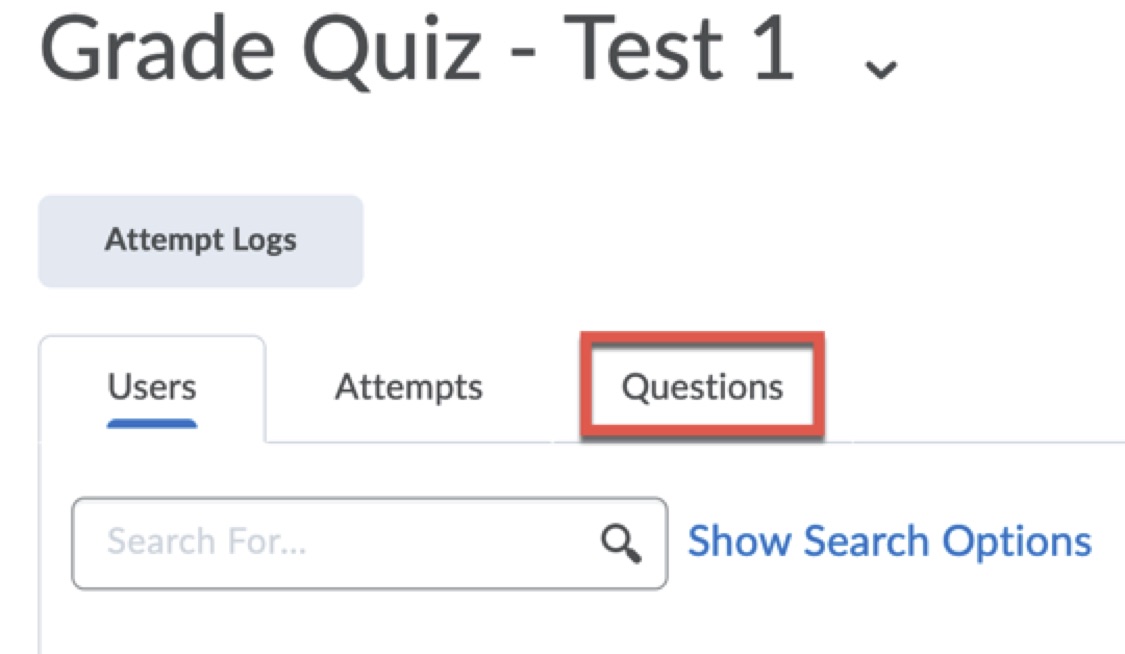
On the “Grade Quiz” page, click the “Questions” tab near the top.
-
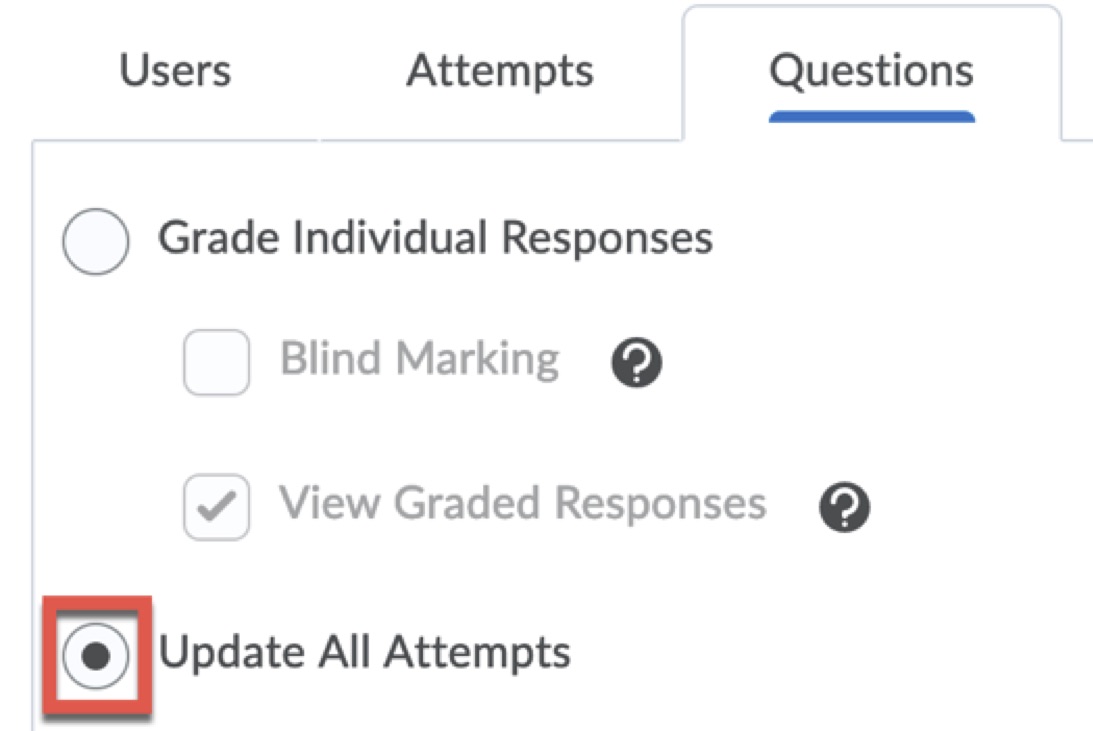
Select the button in front of “Update All Attempts.”
-
Scroll to the bottom of the list of questions. You may see a section called “Questions that are not in the quiz anymore.” Any question you edited after someone answered it will be listed in this section at the bottom of the page.
Manual insert image: http://blogs.wright.edu/learn/pilotrci/files/2013/06/not-in-quiz-anymor…
-
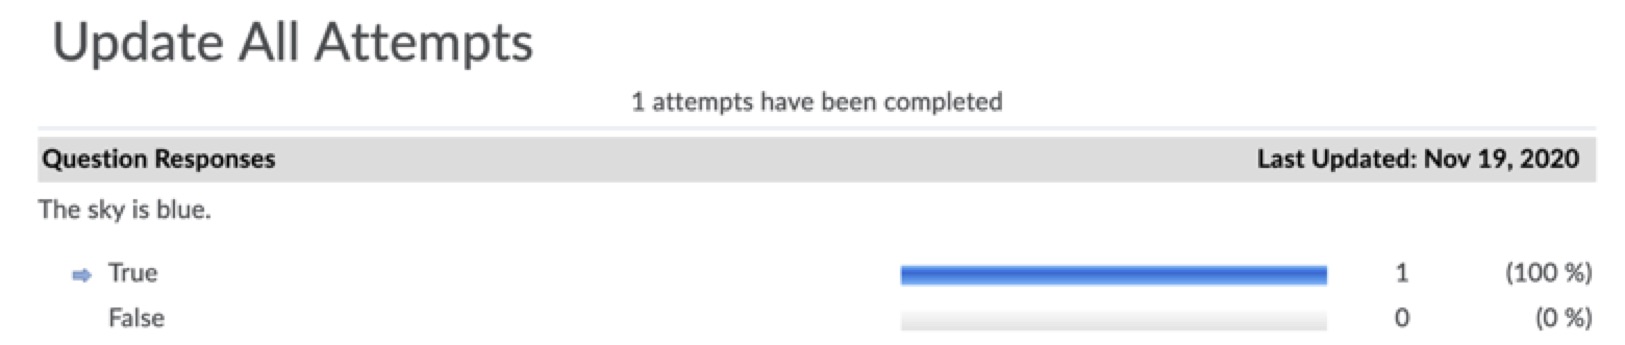
Next, you will click on the question you would like to update. Here you will see the question, it’s answers, and how many people checked each answer. These will only reflect quizzes submitted before you changed the question.
-
A little farther down the page, you will see the “Grade” section. Here, you can give all attempts a certain number of points, regardless of which answers were checked. Or you can choose to give points to anyone who chose a particular answer.

When you’ve finished updating the points, make sure you click on the blue Save button. Keep in mind that when you click “Save,” Pilot will only change the scores for quiz attempts submitted before you changed the question.
-
You may also need to unpublish, save, then republish the quiz attempts to push the new scores into Grades.
Shortcut: Leave the Question Be
If all your students have taken the quiz before you realize a question has a problem, you can go straight to fixing the points without fixing the question. Follow steps 1 through 4 above. There won’t be a section at the bottom for old versions, though. So just click the question in the main list. You will have the same options to assign points as described in step 7 above.
Of course, if you want to import the quiz into another course, you will need to remember to fix the offending question in your new course before students take the quiz. So it’s probably better to go ahead and fix the question in the original quiz. Then your new course will get the correct version of the question when you import the quiz.
Or Delete the Question
If you delete a question after students have taken the quiz. The existing attempts will have a red message on the question, just like edited questions. The total number of points for the quiz will drop by the point value of the question you delete. But the student’s point scores won’t change, which means they may be higher than they should be. A student’s percentage grade may even exceed 100.
To update students’ scores, you will need to go into each students’ attempt and click the “Auto Grade” button.
Can I make a copy of an old quiz available for students to review?
Is there a way to copy the Midterm Exam in my course and rename it Midterm Exam Review? I would like students to collectively retake the exam but I don’t want the results to go to the grade book.
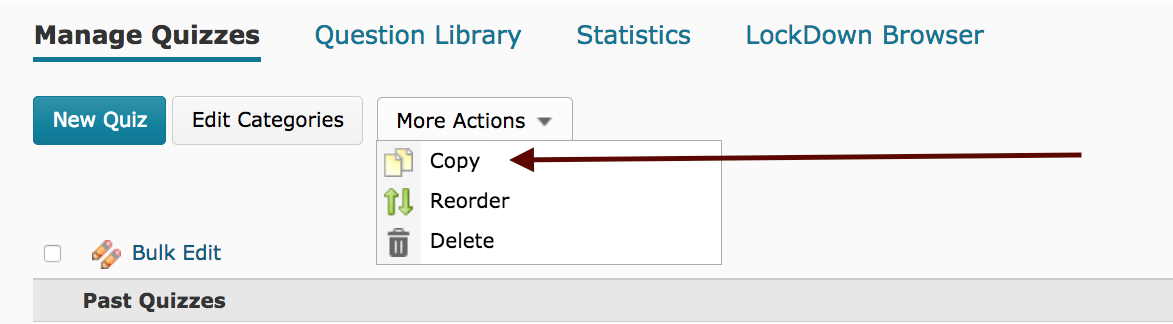
-
To make a copy of an exam, go to the Quizzes and Exam tool and click on the “More Actions” tab to select “Copy” (see screenshot). On the next screen, you will be able to select the exam you want to copy and rename it. Once the copy is made, adjust the settings and remove any associations to Grades.
How do I download quiz statistics and reports?
Quiz Statistics
You can save the following for a quiz that has been taken by student:
- User Statistics – includes students’ quiz scores.
- Question Statistics – includes average scores by question.
- Question Details – includes number of times various responses were made for the questions.
Follow the procedure below to export statistics for a quiz:
-
Go to the Quiz
-
Select Statistics from the drop-down by the quiz name.
-
Select the tabbed page for the statistic you wish to export:
- User Stats – for user statistics
- Question Stats – for question statistics.
- Question Details – for question details.
-
The results will be displayed. Press the Export to CSV File button near the top.
-
When the file is ready to be downloaded, you will have the option to save the file.
Note: The exported file may contain sensitive information such as private student information. Store the file in a secure, password-protected location.
Quiz Reports
You can save any of the following types of reports that have been created for a quiz:
- Question Statistics – includes average scores by question.
- Question Details – includes number of times various responses were made for the questions.
- User Statistics – includes students’ quiz scores.
- Attempt Details – includes questions, responses, and scores for each question of every quiz attempt.
- User Attempts – includes quiz scores, start times, and completion times of every quiz attempt.
Follow the procedure below to export a report for a quiz:
-
Go to the Quiz
-
Select Reports from the drop-down by the quiz name.
-
A list of available reports your role has access to view will be displayed. Select the link for the report you wish to export.
-
Optionally, choose the earliest and latest dates to specify a time period for including attempts in the report. If the report has too much data to export it all at once, try exporting it in portions by date ranges.
-
Optionally, press Generate HTML Report to preview the results on your computer, and then press Go Back to Generate Report when ready.
-
Press Generate CSV Report.
-
When the file is ready to be downloaded, you will have the option to save the file.
-
Press Done when finished.
How do students see quiz results?
Here is how students see results, such as what questions they got right or wrong. This assumes the instructor has set up the “submission view” to allow students to see more than just their grade.
-
Click “Assessment” on the course navbar and choose “Quizzes and Exams.”
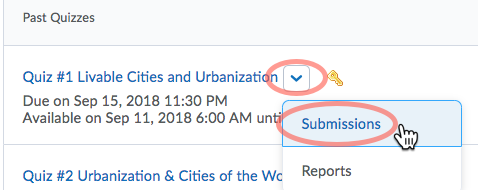
-
On the Quizzes page, click the little downward-pointing arrow next to the quiz and choose “Submissions.”
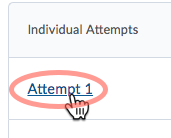
-
There will be a list of attempts the student submitted for the quiz. Click the attempt to be views, usually “Attempt 1.”
-
What the student then sees will depend on the submission view the faculty member has chosen for the quiz.
Can a quiz be printed from Pilot?
When making a quiz, sometimes there is nothing as nice as a hard copy when you want to proofread and mark your mistakes. Here are three ways to print a copy of a quiz you created in Pilot.
- Use Respondus to print the quiz or save it as a Word file.
- Within Pilot, print the quiz preview.
- Take the quiz as your demo student, then print that attempt.
Print a Quiz from Respondus
With Respondus software, you can print a quiz or save it to a Microsoft Word file, with or without the answers.
-
Assuming you already have the quiz open in Respondus, click the “Preview & Publish” tab at the top, then click “Print Options” at the left. Choose options such as whether you want just the exam, the exam with answers, or just the answers. Then you can view it, save it to a file, or print it.
Respondus is a Windows application for creating quizzes offline. You can download it from ConnectWright. (Be sure to click both “Download” and “Registration Code.”) Also see the Respondus User Guide, a Microsoft Word document.
Print a Preview from within Pilot
Within your Pilot Course, you can view a preview of your quiz and print that, if you want. It will only show you the quiz questions, not their answers.
-
From the “Assessment” menu, go to “Quizzes & Exams.” Click the downward arrow next to the quiz you want to print. Then click “Preview” followed by “Start Quiz.” Right click somewhere in the column with the quiz content and choose to print just that frame.
-
If you have restricted the number of questions that show at one time, you may first want to go to your quiz’s “Layout/Questions” tab, clear the “questions per page” box, the click “Apply” so the quiz will show all questions at once. You can apply your restriction again after you have printed your quiz.
Print a Demo Student Attempt
From within Pilot, you can take the quiz as your demo student. Then you can view that attempt to see and print the questions and answers.
-
In the Classlist of most automatically-created courses, you will see a student named something like “demo zzstudent.” Click the downward arrow next to that student’s name and choose to impersonate. Go take the quiz. Then click the demo student’s name at the top right of your screen and click “Restore” To get back to your own faculty identity.
-
Now from the “Assessment” menu, go to “Quizzes & Exams.” Click the downward arrow next to the name of the quiz you want to print and choose “Grade.” Then click the demo student’s “attempt” to see and print the quiz and its answers.
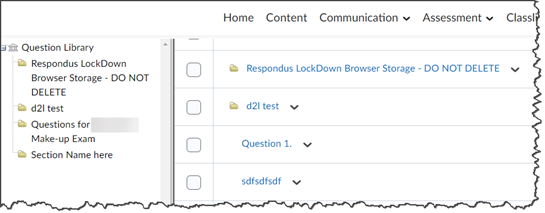
Why Don't I See the Question Marks in the Question Library Anymore?
Are you a Pilot Question Library user? Then you may be used to seeing a Folder icon for sections of questions and a large blue question mark for individual questions.
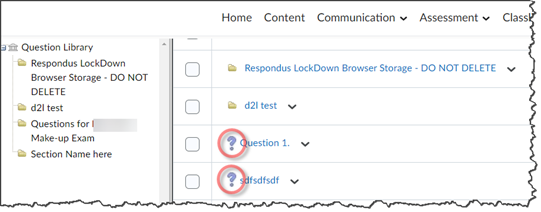
To clean up visual clutter, those question marks have been removed from view.
How do I provide individualized quiz feedback to the students during grading and what do they see?
Depending on the settings, you can provide individualized quiz feedback in three places, and the students can see it all.
- Overall
- Attempt
- Individual Quiz
Overall
You can add Overall feedback for the whole test.
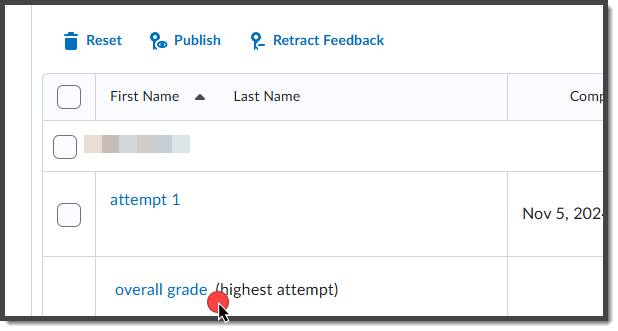
Go to the Grade Quiz page and click on the Overall Grade link.
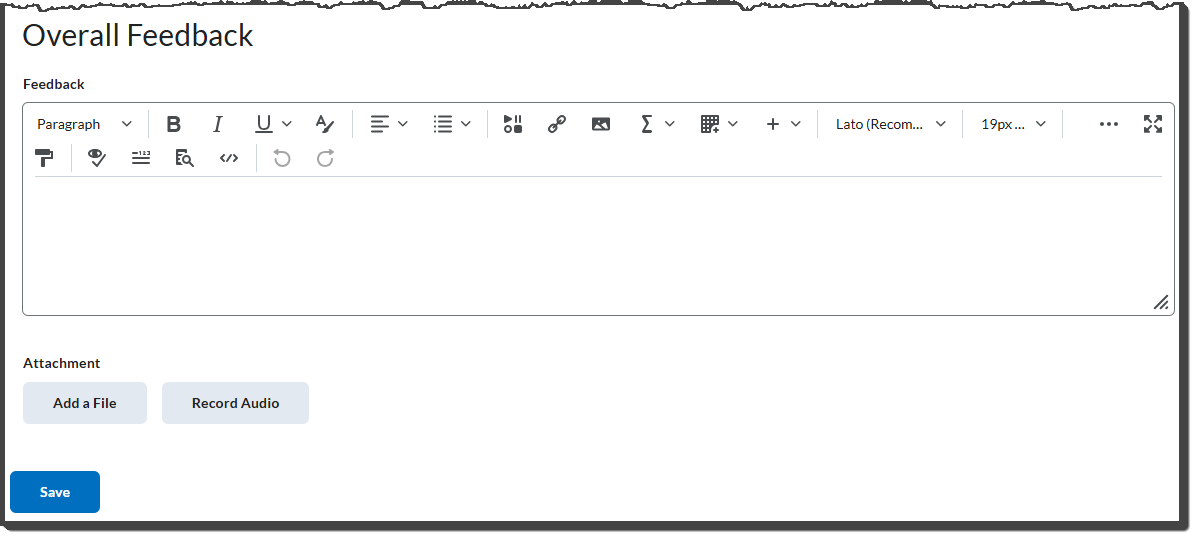
Then scroll down to the Overall Feedback section. Use the HTML box to type feedback. You can also add an attachment.
When you're finished, click Save.
Attempt
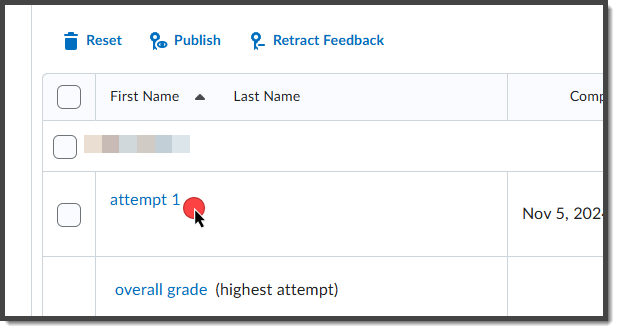
Attempt Feedback can be different than Overall Feedback if more than one attempt is allowed. Click on the attempt itself.

Scroll to Evaluation Summary and type into the Attempt Feedback field.
When you're finished, click Update.

Individual Question
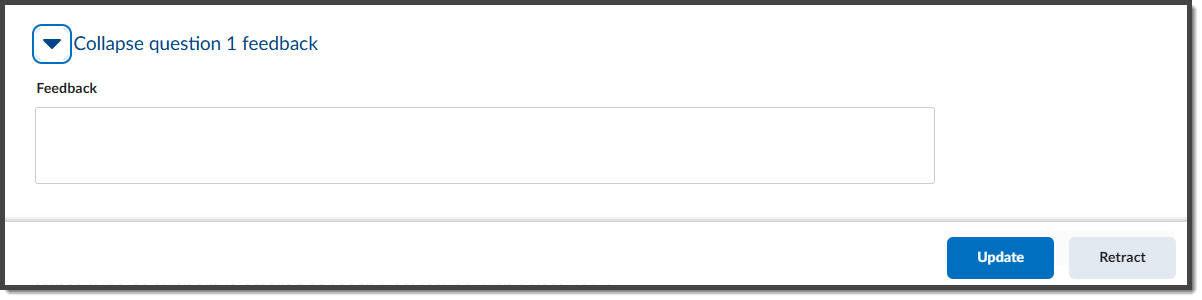
You can add feedback to individual questions. (This will be visible to the students if you've set up the quiz to display the questions and correct answers once they've completed the quiz.)
Click on the attempt.
Each question has a field for Feedback. Click Expand Question # Feedback.
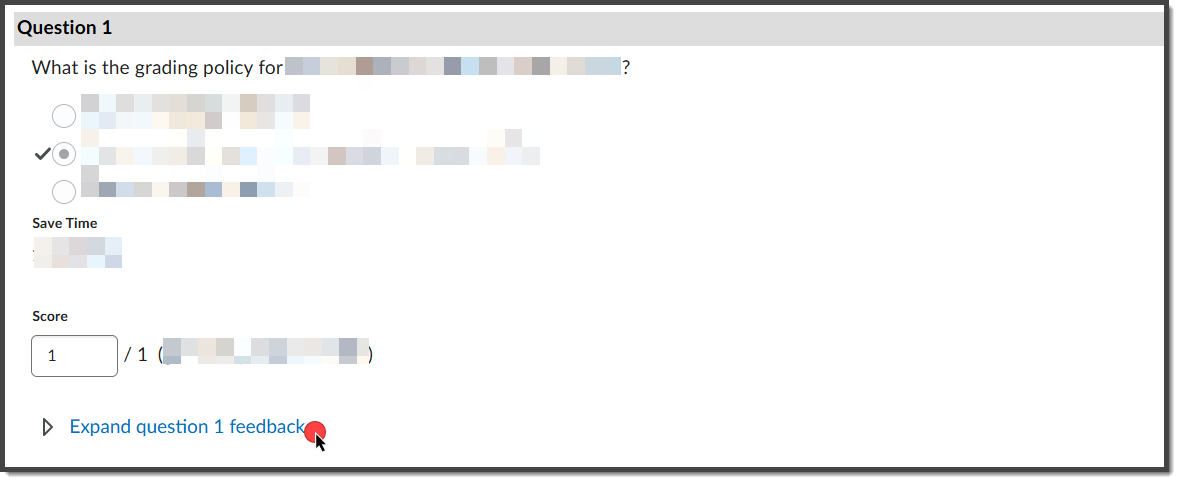
Type your feedback in the field.
When you're finished, click Update.
What do the students see?
The student Overall feedback by going to Grades and viewing the "Feedback" for that specific quiz.
They can see Attempt and Individual Question feedback by viewing the quiz attempt itself.