- About the Grades Tool
- What is the Grades Setup Wizard? How do I use it?
- How do I create a grade item?
- How do I create a grade category?
- How do I export Pilot grades to Banner?
- How to Optimize the Students Gradebook View
- Why is the final calculated grade 0/0?
- How do I calculate a Weighted Grade?
- How do I export grade data?
- Can I eliminate or hide grade items?
- What are the ways I can manage bonus points?
- How do I drop the lowest quiz grade?
- Why does Banner give me the Error "No final grades to send?"
- In the gradebook, what does the question mark mean?
About the Grades Tool
The Grades tool in Pilot allows faculty and students to track student progress in each course. Faculty can also connect grade items to assignment submissions, quizzes, and discussion boards. This leads to all grading in the course being automatically published to the online gradebook.
What is the Grades Setup Wizard? How do I use it?
View the Pilot Gradebook Quick Reference Guide (PDF)
-
Pilot provides a Setup Wizard to assist you in determining the appropriate settings for your grades. If the Wizard doesn’t appear when you open the Grades tool, click on “Setup Wizard”.
-
Choose Your Grading System
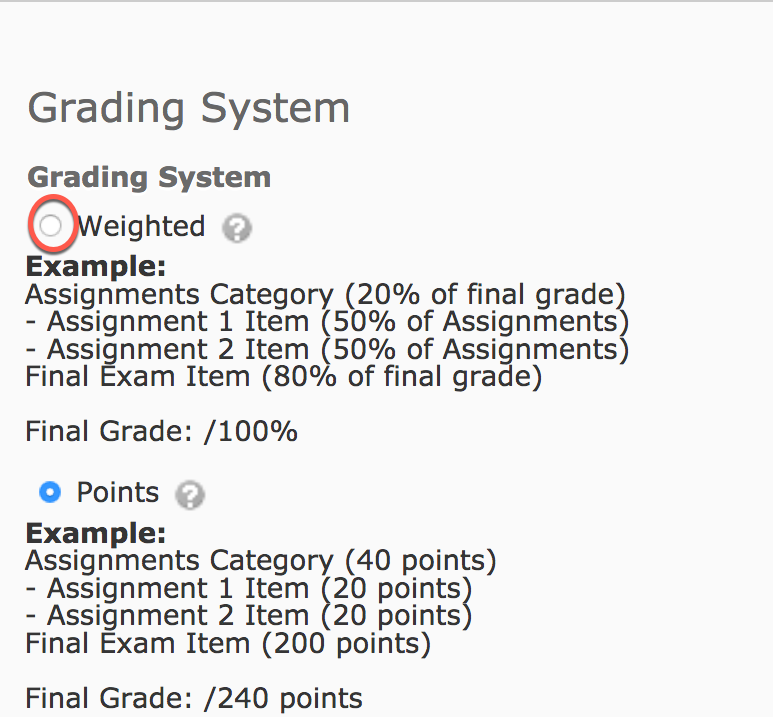
- Weighted: Grade categories are assigned a percentage of the final grade. Grade items are assigned a percentage that represents their value within the category.
- Points: Grade items are assigned point values and the final grade is calculated as the sum of points earned divided by total possible points.
- Formula: Grade items are calculated using the points system, but a formula is used to determine how each grade item contributes to the final grade.
-
Final Grade Released
- Calculated: A student’s final grade is based upon the grading formula that is set and you cannot adjust it without manipulating individual grade items.
- Adjusted: You have the option of modifying a student’s grade before releasing it.
-
Grade Calculations
- Ungraded Items: Pilot will either omit missing grade items from the final grade calculation, or will assign missing grade items a value of zero.
- Auto Update: Final grades are automatically updated when changes are made to grade items.
-
Choose Default Grade Scheme
- Choose to default to a percentage scheme or to use an organizational letter grade scheme. Use the percentage scheme during the term. You will switch to the organizational letter grade scheme before submitting your final grades to Banner.
- The default percentage scheme in Pilot is the 90/80/70/60 scale. You can set up your own percentage grade scheme by clicking on Grades > Schemes > New Scheme.
-
Managing View Display Options
- Select the number of decimal places to use in displaying grades in your view (must be between 0 and 5).
-
Student View Display Options
- Choose whether you want the student to see Points Grade (percentage) and/or Grade Scheme Symbol (A,B,C,etc.)
- Select the number of decimal places you want to display, to students, in the gradebook (must be between 0 and 5).
-
Click on Finish.
-
In the future, if you want to change any of the settings that you’ve chosen, click on Settings, in the upper right corner of the Gradebook view. If you reopen the Setup Wizard, you must run through the entire Wizard.
How do I create a grade item?
Each column in your gradebook represents a Grade Item. Every graded assignment, quiz, etc. has to have its own, individual, Grade Item assigned to it. Grade Items can be grouped under Grade Categories, particularly if you are using a weighted grading system, or they can stand alone, without categories, if you are using a points grading system.
To create a Grade Item:
-
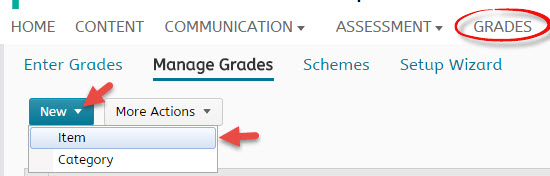
Inside your course, open the Manage Grades view. Click on New and select Item from the dropdown menu.
-
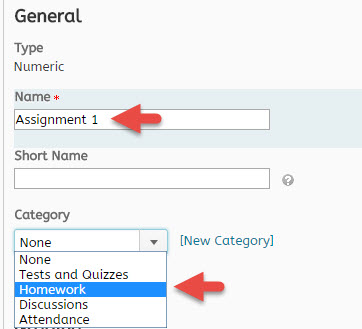
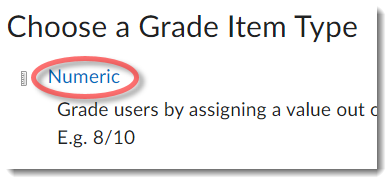
Select the Grade Item Type (usually Numeric).

-
Name the new Grade Item and, if you have created categories in your Gradebook, select the appropriate category. For a tutorial on creating Grade Categories, click here.
-
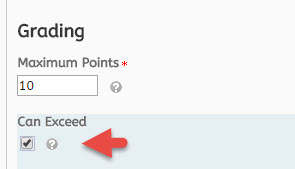
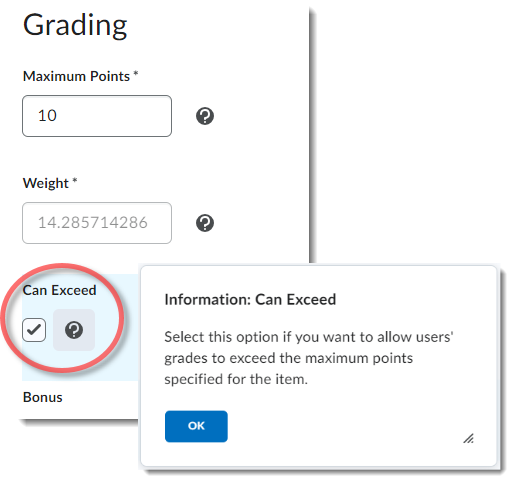
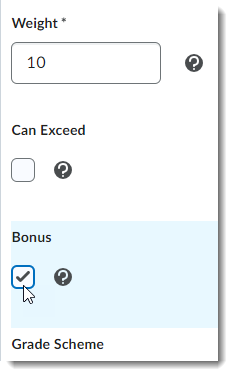
Enter the total point value of the assignment. If it is possible for the student to earn more than the point value (i.e. it is possible to receive a score of 11/10), check the Can Exceed box.
-
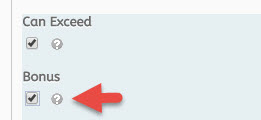
If the entire value of the Grade Item is to be considered as bonus points, also check the Bonus box. Note: this will only add to the points earned, not the total possible points, in the final grade calculation.
-
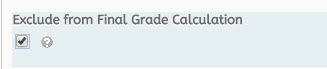
If this grade item is for bookkeeping purposes only and should not be included in the calculation of the final grade, you can check “Exclude from Final Grade Calculation“. Note that, if you check this box, the point value of this item will not be included in any of the grade calculations.
-
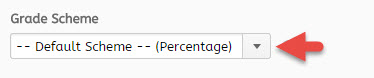
The Default Grade Scheme should be Percentage.
-
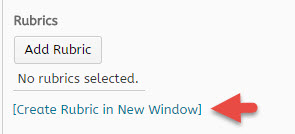
You can attach a grading rubric to the Grade Item. You have the option of selecting an existing rubric or creating a new one.
-
You can set Display Options for the students’ Gradebook view, and for the view that is seen by those with Faculty and TA status (Managing View).
-
Click Save.
-
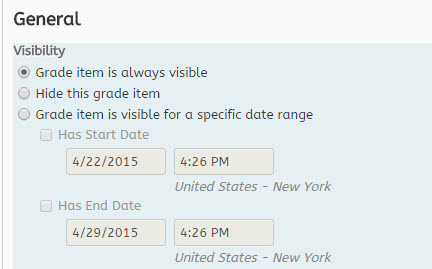
Under the Restrictions tab, you can set a specific date range for a Grade Item to be visible, or you can hide the Item from view. Hiding the Item is an option if you want to grade all student submissions before anyone sees their grade. To unhide the Item, return to the Restrictions tab and select “Grade item is always visible“.
-
Remember to Save your changes.
How do I create a grade category?
Gradebook categories can be used to organize and group related grade items together. For example, you may want to create separate grade categories for Quizzes, Dropbox Submissions, Discussions, etc. By organizing your grades in this way, you can evenly distribute points between grade items in each category, or drop the lowest item grade in a category.
-
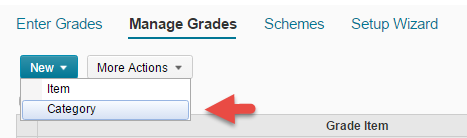
From the Grades page, click on Manage Grades. From the New menu, select Category.
-
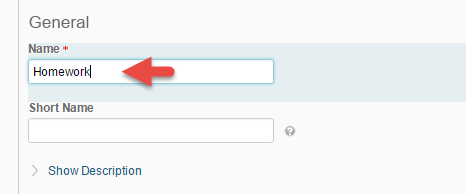
Name the category. You can, also, enter a short name that will be displayed as the heading in your gradebook column and a description for the category (although neither is required).
If you are using a “Points” grading scheme
-
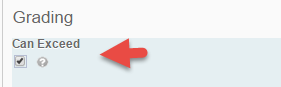
If, due to the awarding of bonus points, the value of the category may exceed the assigned value, click on “Can Exceed”.
-
If you don’t want the grades entered in the category to be counted in the calculation of the Final Grade, click “Exclude from Final Grade Calculation”

If you are using a “Weighted” grading scheme
-
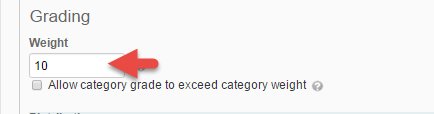
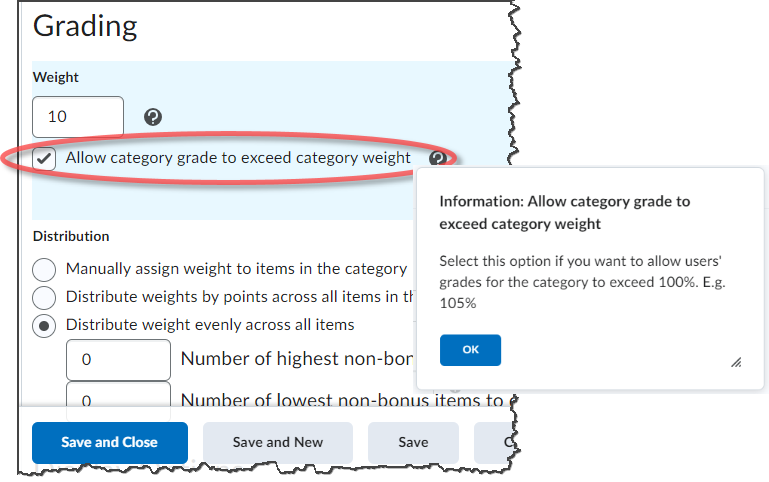
You will assign a weight to the category that indicates how it will be calculated into the Final Grade. You can also choose to allow the value of the category to exceed the assigned value.
-
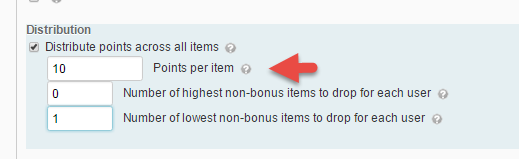
You can choose to have Pilot distribute points equally among the items in the category. You can also drop the number of highest or lowest scores that you indicate.
How do I export Pilot grades to Banner?
To learn how to push/export grades from Pilot to Banner, watch the video, download the linked PDF instructions, or follow the written steps below it.
- Push Midterm Grades to Banner (PDF)
- Push Final Grades to Banner (PDF)
- Submit Final Grades to WINGS Express (PDF)
Step 1: Grade Settings
-
Log into Pilot and your course.
-
From Grades on the Navbar select Settings (upper, right corner of the screen)

-
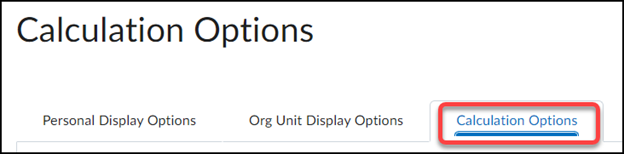
On the Grade Settings page, click on the Calculation Options tab.
-
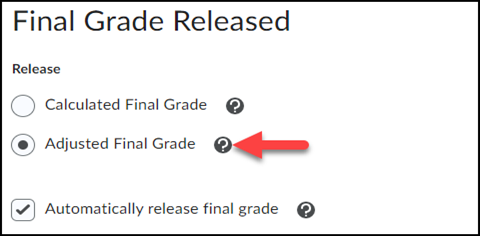
Under the Final Grade Released section, select Adjusted Final Grade. If the Adjusted Final Grade is already selected, you don’t have to change this setting.
-
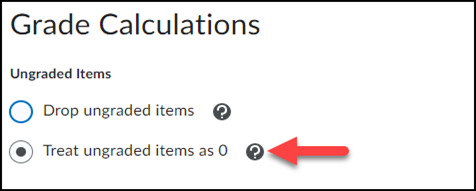
For Final semester grades, select “Treat ungraded items as 0.”
-
For Final semester grades, select “Treat ungraded items as 0.”
-
Click Save at the bottom of the page.
-
Confirm.
Step 2: Change the Grade Scheme
The final grades you submit to Banner must be letter grades. If your final grades display as percentages, as they will by default, you must change the “Grade Scheme.”
-
From Grades on the Navbar click Manage Grades.
-
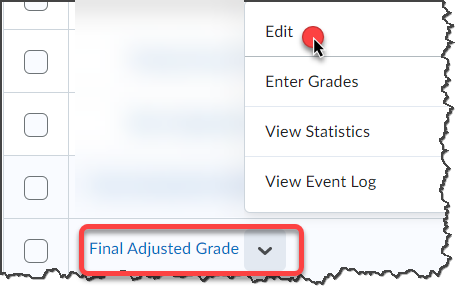
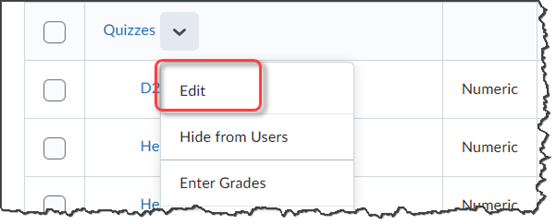
From Managed Grades, click the action arrow next to Final Adjusted Grade. Select Edit.
-
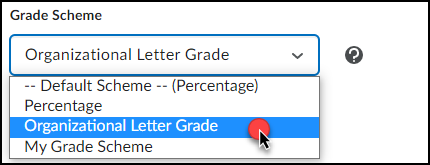
In the Grade Scheme drop-down, select Organizational Letter Grade.
-
Click “Save and Close.”
Step 3: Transfer Calculated Grade to Adjusted Grade
From Grades on the Navbar click Enter Grades.

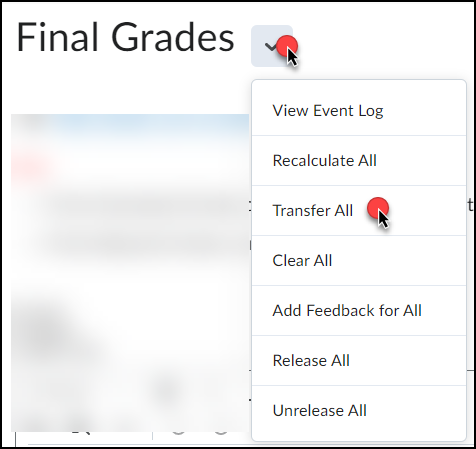
From Enter Grades, click the action arrow next to Final Calculated Grade, select Enter Grades.
From the action arrow next to Final Grades (at the top), select Transfer All.
Confirm and then Save and close.
Step 4: Adjust Final Grades (Optional)
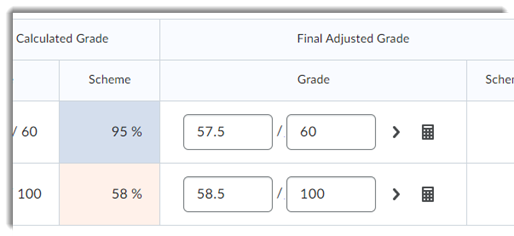
You can adjust grades in the Final Adjusted Grades column.
Note: Pilot does not round up so you will have to make that adjustment manually.
Step 5: Release Final Adjusted Grade to Student View (Optional)
*Skip this step if you skipped Step 4.
From the Grades section, click Enter Grades.
From the action arrow next to Final Adjusted Grade, select Enter Grades.
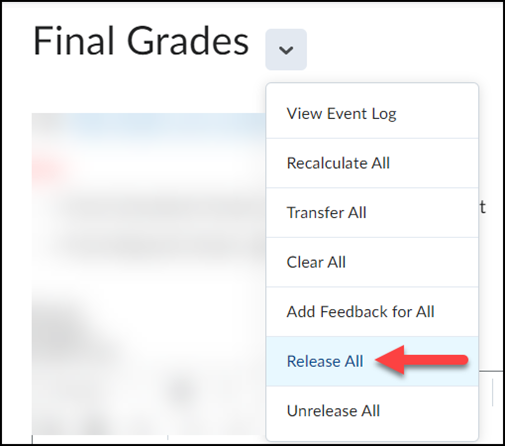
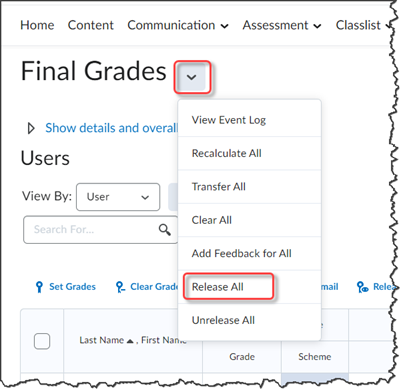
From the action arrow next to Final Grades (at the top), select Release All.
Click Save and Close at the bottom of the page.
A Confirmation window will pop up. Click on Yes to release the grades.
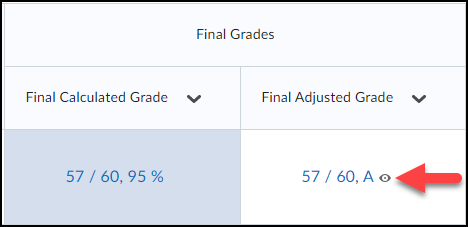
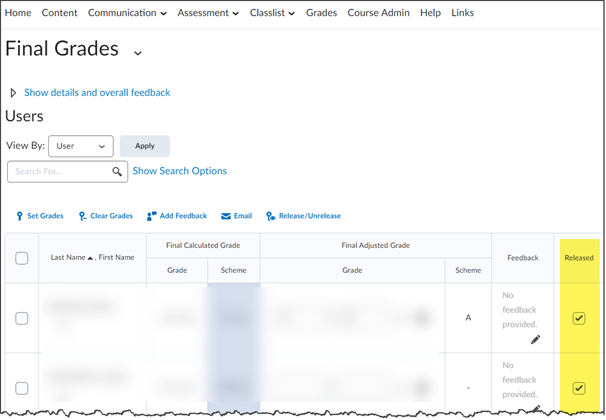
To verify that the grades have been released, open the Enter Grades view. In the Final Adjusted Grade column, an icon next to each grade indicates that the grade has been released. If you see this icon with a line through it, go back and repeat Step 4.
Step 6: Export Final Adjusted Grades to Banner
From the Grades section, click Enter Grades.
From Enter Grades, click Export Grades to Banner.

In the Grade Type, select either Midterm or Final Grade, accordingly.
A list of your students with their Adjusted Final Grades will be displayed.
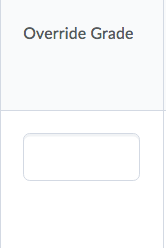
Check over the grades. If you need to make any changes, enter them under the Override Grade column.
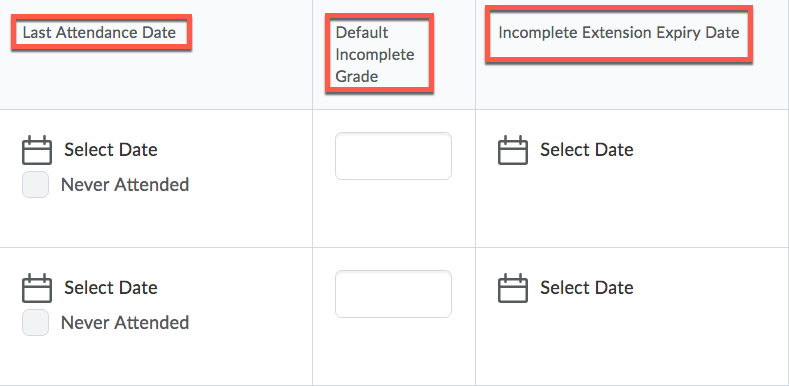
Also, please note that there are three columns on the Export Grades screen that for the time being should be ignored: Last Attendance Date, Default Incomplete Grade, and Incomplete Extension Expiry Date.
Select all students by clicking the top checkbox.
To complete the grade submission to Banner, click on Export in the bottom left corner of the page.

When the grade transfer is complete, an Export Details page will appear and in the Result column it should say “Accepted by SIS.”

Verify
You can verify that the grades were submitted by logging into Wings Express, then under the “Faculty” tab, open “Faculty Grade Summary.”
You have until grades are set in Banner to make changes. Grades are set in Banner at around 4:00 AM (EST) each day. After that time, you’ll have to click on “Change Grade” beside the student’s grade and complete and submit the form.
Cross-listed?
If cross-listed, you will run this for every section.
Problems?
If you have any problems with grade submission during the submission period call the Help Desk at 937-775-4827 and someone will assist you.
If you have any problems with grade submission AFTER the submission period contact the Registrar’s Office.
How to Optimize the Students Gradebook View
This video walks you through optimizing your student's view of their gradebook:
These instructions will show you how to not only optimize the student's view of the gradebook but yours as well.
There are three parts to making this happen:
- Set up Calculation Options correctly.
- Set the Display Settings to display the results to your students.
- Release the Calculated grade to your students.
Calculation Options
Go to “Grades” and click the “Settings” link near the top right of the screen.
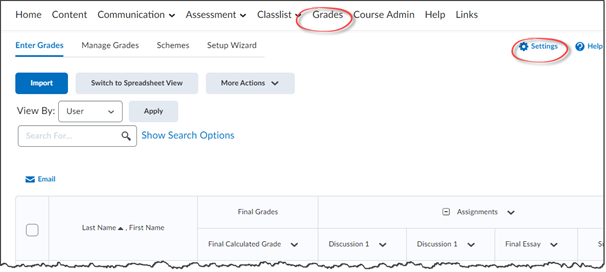
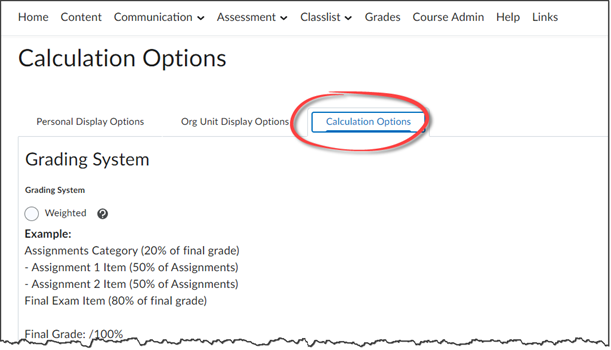
Near the top of the “Settings” screen, click the “Calculation Options” tab.
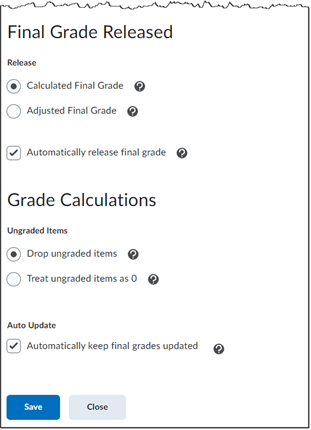
- Under “Final Grade Released,” check “Calculated Final Grade.”
- Checkmark Automatically release final grade
- For “Ungraded Items,” choose “Drop ungraded items.”
- Checkmark “Automatically keep final grades updated”
- “Save.”
Personal Display Options
- Click the “Personal Display Options” tab.
- Select at least “Points grade” and “Grade scheme symbol.” (Other boxes, such as “Grade scheme color” are optional.)
- “Save.”

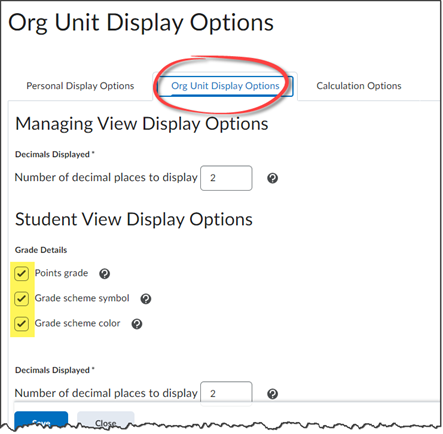
Org Unit Display Options
- Click the “Org Unit Display Options” tab.
- Select at least “Points grade” and “Grade scheme symbol.” (Other boxes, such as “Grade scheme color” are optional.)
- “Save.”
Save and close.
Release Grades
Finally, once again click “Grades.”
Next to “Final Calculated Grade,” click the action arrow and choose either “Enter Grades.”
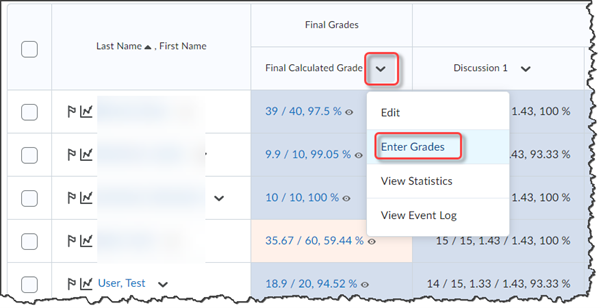
On the next screen, click the action arrow next to the “Final Grades” heading at the top of the page and choose “Release All.” When asked if you are sure, click “Yes” to continue.
Then all the boxes should be checked in the “Released” column.
Click “Save and Close” to return to “Grades.”
Check Your Work
View through the Demo Student.
You can use a Demo Student to see what your students will see. If you have not yet created a demo student, click “Classlist,” then click “Create a Demo Student.” When you finish creating your demo student, you will find yourself at your Classlist.
Note: You may want to put some values in the demo student’s Grade items next so you will see more than just zeros.
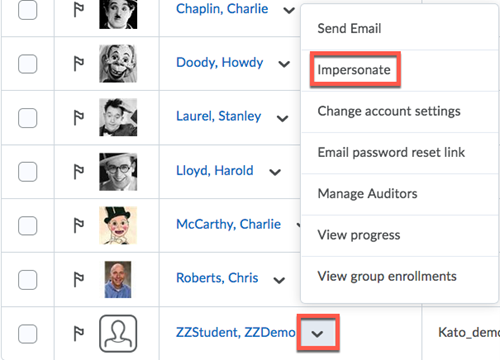
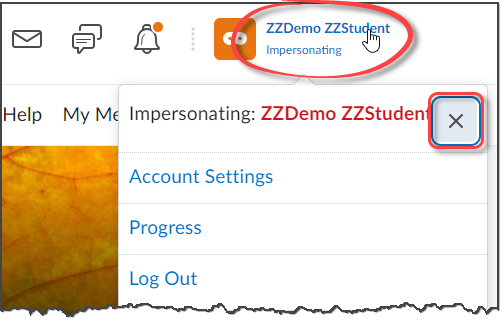
- In your Classlist, find your demo student whose name will be “ZZStudent, ZZDemo.”
- Click the action arrow next to your demo student’s name and choose “Impersonate,” then confirm that that is what you want to do.
You can now click “Grades” and see what a student will see.
Exit Demo Student view
After you have viewed your course through your demo student’s eyes, click the demo student’s name in the top right of your screen. Then click the “X” to stop impersonating the demo student and return to your faculty role in the course.
Why is the final calculated grade 0/0?
In a Grade book with a Points grading system, the Final Calculated Grade is 0/0.
To fix that,
This rare glitch showed up in December of 2018.
Go to Grades and click the blue “Settings” link near the top right of the page.
Click “Calculation Options.”
Scroll to the bottom of the Calculation Options page and check the box to “Automatically keep final grades updated.“
Click “Save,” then “Close.”
How do I calculate a Weighted Grade?
Grades in Pilot can be organized by points or by percentage weights. The default course setting is “Points,” so the steps below describe the process of changing to “Weighted.”
Go to Grades and click on Settings.

On the Settings screen, select the Calculation Options tab.

On the Calculation Options screen, select “Weighted” instead of “Points” and click Save to complete the process.
How do I export grade data?
You can export all information from a grade book, including the original point values, grade scheme symbols and ‘out of’ grades to a .cvs or .xlsx file that can be opened with Microsoft Excel and other spreadsheet applications.
Go to the Grades tool and select Enter Grades.
Select the Download Grades as CSV tab near the top of the page.
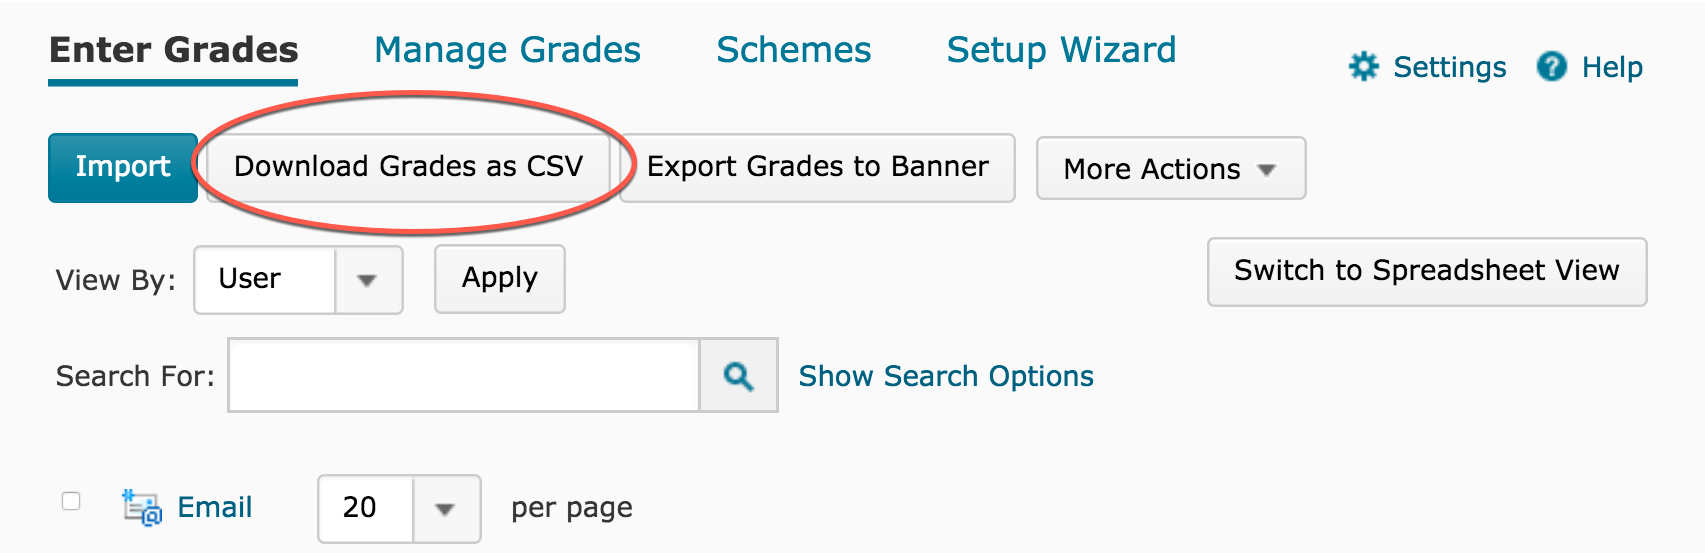
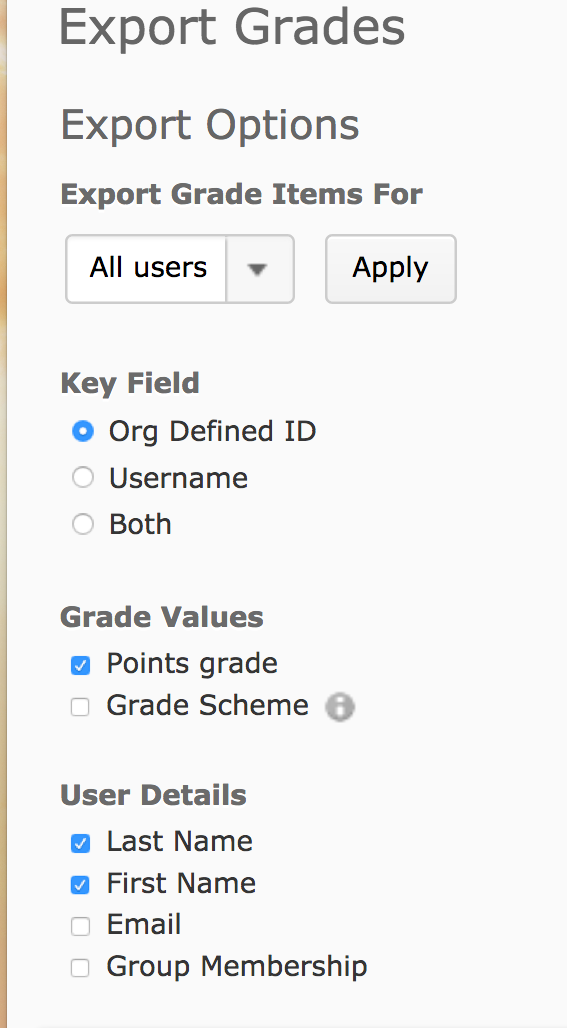
The “Export Grades” page appears.
- By default, “Export Grade Items for” is set to All users. Leave it as set.
- Choose whether to export the “Org Defined ID”, “Username” or “Both” for each user.
- Select the grade values you wish to export: “Points grade” and/or “Grade Scheme”.
- Select the User Details you wish to export.
To export all Grade values, check the ‘Select all rows’ box just below “Choose Grades to Export” and above “Grade Item”.

To export individual grade itecs, select the boxes by each grade item.
Press the Export to CSV button or the Export To Excel button near the bottom to export the gradebook data as a .csv file or .xlsx file, respectively.
When the file is ready to be downloaded, click the link presented. You will have the option to save the file.
Can I eliminate or hide grade items?
You can do both. See the instructions below. Additionally, you’ll find a short video after the instructions.
Eliminate an item or category
It is fairly simple to eliminate an item or category. If eliminating a gradebook item, ensure that it is NOT associated with anything.
From the Manage Grades tab, click More Actions and then click Delete. The screen will change to Delete Mode.
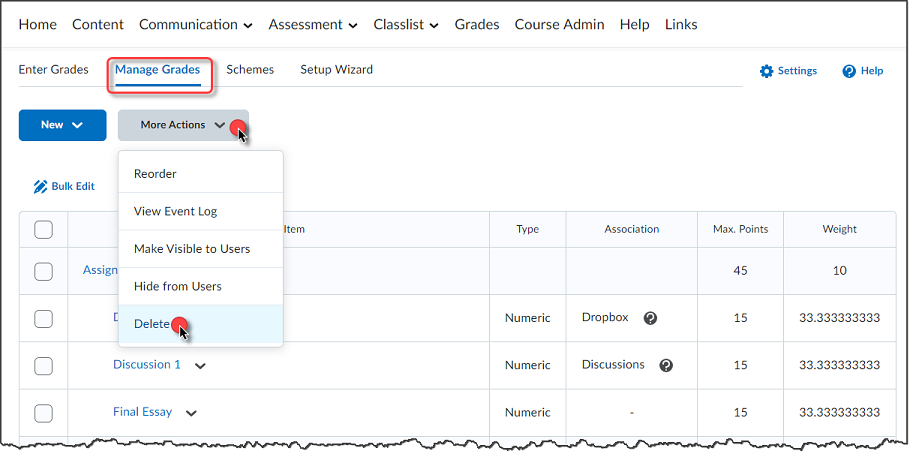
Select the item(s) to be deleted. Click Delete.

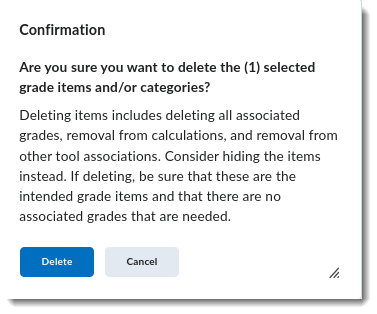
You will be asked to confirm the delete action.
Hide a Category
You can also create a hidden Holding Area category for those assignments you do not yet want students to see.
Under the Properties tab, as long as you are using a weighted grading scale, assign the category a weight of “0.” This keeps that grade from impacting their overall grade until you later place it in an unhidden category.
Under the Restrictions Tab, select "Hide from Users."
Be sure to save along the way.

If/when you want to show students that grade, just re-assign it to a regular category under Edit Grade item/Properties.
What are the ways I can manage bonus points?
How to add bonus questions to a quiz
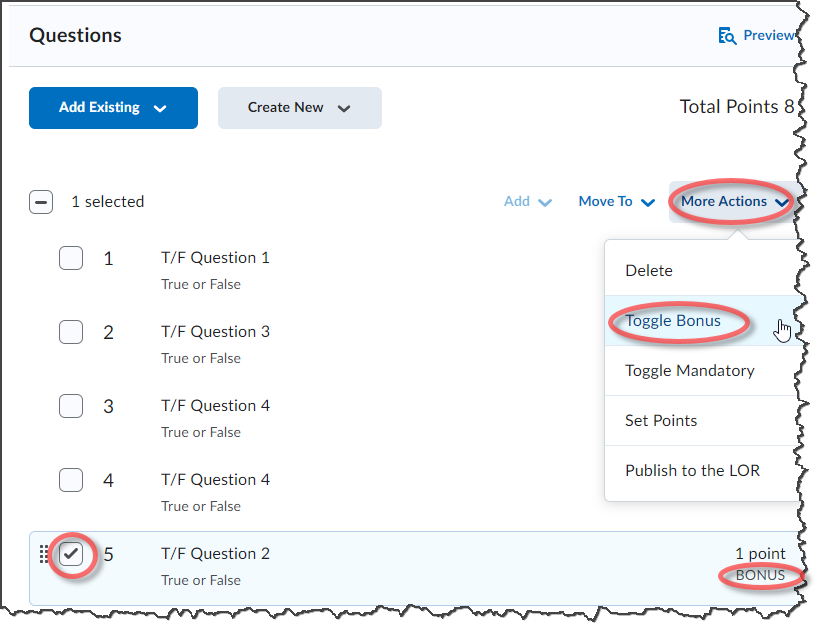
Within a quiz, select the question(s) that will be a bonus, click the More Actions drop menu, select “Toggle Bonus,” Save, and see the selected question(s) now marked as BONUS.
How to set up a quiz to allow the final grade to exceed the max points using bonus points
From the Manage Grades tab of Grades, on the Properties tab find the Can Exceed checkbox.
- Leave it blank to allow bonus points to increase the grade up to, but not to exceed the maximum points.
- Select this to allow bonus points to increase the grade and even possibly exceed the maximum points.
How do I make an entire quiz a bonus quiz?
First, make a grade item, just like any other. Click the blue "New" button and choose "Item."

Then choose "Numeric" for the "Grade Item Type."
Then you’ll find yourself on the "New Grade Item" page, which is where you’ll work your bonus point magic.
The difference between this bonus grade item and any other grade item is that you will scroll down and check the box that says "Bonus," and save it.
Bonus points added to a grade item directly increase the overall score.
- For example, in a scenario with five grade items, each worth 25 points:
- Normally, all item points (125) are summed and divided by the total available.
- However, marking one item as a bonus excludes it, resulting in a sum from the remaining four items (max 100 points).
- Students gaining bonus points will boost their scores without penalty if they don't earn these extra points.
How to set up a Category to properly calculate the grade with Bonus points
From the Manage Grades tab in Grades, on the Properties tab, select Allow category grade to exceed category weight.
How do I drop the lowest quiz grade?
In Grades, create a category for your quizzes and put all the quiz grade items in that category.
Go into Grades and then choose Manage Grades;
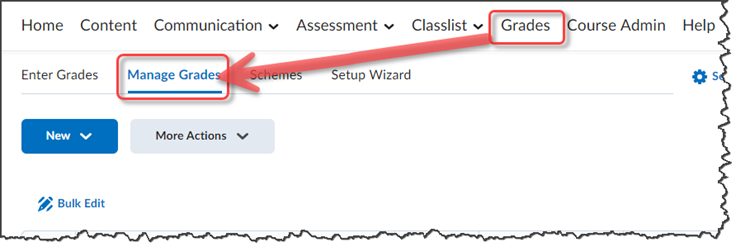
Next to the specific quiz category, (It will be in a grey bar) click on the Actions arrow and select Edit;
Under the quiz Properties tab, place a check next to Distribute weight evenly across all items (if not already selected) and then define how many non-bonus quiz grades to drop for each user and save.

Best Practice
It is best to do this after students have submitted at least one quiz more than the number being dropped. Otherwise, the first quiz a student submits will be labeled “Dropped.” Although it’s the only quiz, it’s also the lowest grade so far. You will get emails from alarmed students.
Why does Banner give me the Error "No final grades to send?"
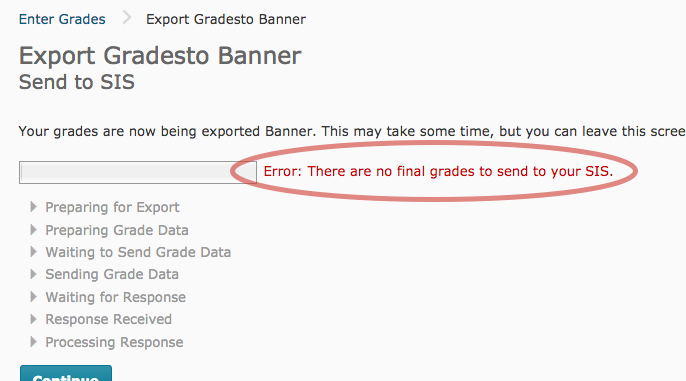
When sending grades to Banner, some faculty get this message:
Error: There are no final grades to send to your SIS.
That happens when…
- Banner has failed to create a section for the course
- or an attempted grade export had failed and corrections need a kick start.
Section Missing
To remedy the problem if the course does not have a section…
Go to Course Admin and click Course Offering Information.
Check the Course has sections box.
Go back to the Course Admin page and click Sections.
Click Add Section and create a section with a name and code that match the format used in other courses.
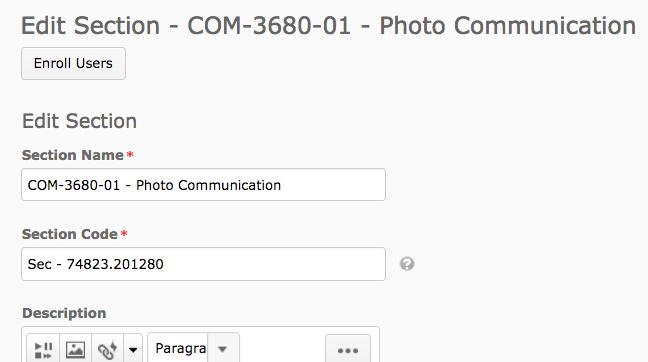
So the section name should be the same as the course name and the section code should be “Sec – ” followed by the full CRN.
A Previous Attempt Failed
If you try to submit grades to Banner without having everything prepared correctly, the export will fail. If you release grades, change the grade scheme, or whatever needs to be done then try another export, you may run into the “no final grades” error. In this case, the old failed state of the submission seems to get cached. If you know you have a section and that the Grades tool is now in order, the ignore the error message and go ahead and click “Continue.” The page with the list of students, their grades, and the little pencil “Edit” icons should pop up. If it does, then you are on your way.
In the gradebook, what does the question mark mean?
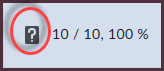
This is the quiz icon, represented by a question mark. This icon appears next to a grade item when it is linked to a quiz and allows instructors to quickly access student quiz attempts. The icon itself does not disappear—it remains as long as the grade item is associated with a quiz.
In some cases, an orange dot may appear alongside the icon. This dot indicates that a quiz attempt includes questions requiring manual grading (such as written response questions).
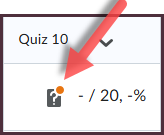
Once the instructor has graded the attempt and published the grade, the orange dot disappears, but the quiz icon remains visible. You can find more info. here: Gradebook icons and notification.
Sample
Here is a sample of a gradebook and the difference you see.
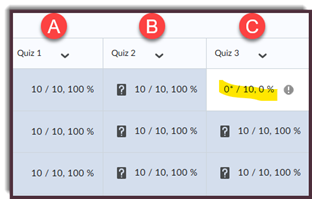
- A - A quiz grade that’s NOT linked to an actual quiz in Pilot. Likely, these grades have been manually added.
- B - A quiz grade linked to an actual quiz in Pilot and all the students have a graded submitted attempt.
- C - A quiz grade linked to an actual quiz in Pilot with all students but one have a graded submission.