WINGS Student and Employee Services

On this page:
About WINGS
WINGS is your self-service site for many of the university services used by faculty, staff, and students, including:
- updating your personal information
- posting/checking grades
- registering for classes
- ..and more!
Available To
Students, Faculty, Staff
Getting Started
Log into wings.wright.edu with your campus username (w#) and password.
Usage Instructions
Here you'll find helpful links and step-by-step instructions to aid you in navigating WINGS.
General Information | Students | Faculty | Staff
General Information
Personal Information - Home/Primary Address
When updating your address on the Personal Information page in WINGS:
DO:
- Ensure you always have a current Home/Primary address
- Click the (+) button to insert a new address. Pick an address type and provide a 'Valid From' effective date for the address.
DO NOT:
- Use overlapping dates on records of the same address type
Students
Many student services are now available directly through WINGS, through the 'Student' and 'Student Academics' buttons under Your Launchpad!
Financial Aid
-
View and Accept Your Financial Aid Offer
- Login to WINGS at https://portal.wright.edu/
- Click on the Financial Aid tile located under Your Launchpad
- Select the appropriate Year from the drop-down list at the top right corner of the screen.
- Select the Offer tab.
- Read all of the messages that appear above your financial aid offers. Some of the aid listed will also include hyperlinks for more information about the type of aid you are offered
- Take Action on each type of financial aid, then scroll down to the bottom of the page to click the Submit button after you Take Action on offered aid.
Financial aid offers can be broken down into sections. Only sections that pertain to you will appear. These sections can include:
Grants and Scholarships to Pay for College are considered gift aid. This is aid that does not need to be repaid. You can Take Action on the gift aid by selecting Accept or Decline. Most grants are already accepted on your behalf.
Work is considered a need-based federal employment program. Participation is contingent on you applying for and being hired by an on-campus employer who participates in the Federal Work-Study Program. You can Take Action on federal work study by selecting Accept, Decline or Modify.
Loans are a type of aid that has to be repaid. You can Take Action by selecting Accept, Decline, or Modify. Choose to modify if you wish to borrow a lesser amount than what is offered. If you accept a loan, be sure to visit the Home tab to complete additional requirements to finalize your loan. Examples of loan requirements include enrollment plans, entrance loan counseling, and a master promissory note. Remember, you must be enrolled half-time to be eligible for federal direct loans.
-
View Financial Aid and Scholarship Requirements
- Login to WINGS at https://portal.wright.edu/
- Click on the Financial Aid tile located under Your Launchpad
- You have arrived on the Home Tab of the financial aid dashboard.
- Select the appropriate Award Year from the drop-down list at the top right corner of the screen.
- On the Home Tab, under Student Requirements, you can view your Unsatisfied and Satisfied Requirements needed to finalize your financial aid.
- Some Unsatisfied Requirements will appear as a link for you to obtain more information about the request.
-
View Your Satisfactory Academic Progress for Financial Aid
- Login to WINGS at https://portal.wright.edu/
- Click on the Financial Aid tile located under Your Launchpad
- You have arrived on the Home Tab of the financial aid dashboard.
- Select the appropriate Award Year from the drop-down list at the top right corner of the screen.
- Select the Satisfactory Academic Progress tab. You will be able to view your current status for federal, state, and renewable institutional aid. If you are unsatisfactory, you can read about opportunities to appeal.
Student Accounts and Bills
-
Designate a Parent/Authorized User to Pay Fees
- Log in to WINGS using your Campus 'w' username and password.
- Select the Student button under Your Launchpad.
- Under the Student Fees section, click Student Account Center.
- Click Authorized Users under My Profile Setup.
- Select Add Authorized User.
- Enter the Authorized User's email address, answer the four questions on the page then click Continue.
- Check the I Agree box and click on Continue. An instructional email will then be sent to the authorized user.
- Authorized Users can then log in with their email address and password by going to the Enrollment Services (RaiderConnect) website clicking on the Student Accounts & Bills tab at the top, then clicking on the View and Pay Bill button under the Parents/Authorized Users tab at the right.
-
Enroll in a Payment Plan
- Log in to WINGS using your Campus 'w' username and password.
- Select the Student button under Your Launchpad.
- Under the Student Fees section, click Student Account Center.
- Click Payment Plans from the banner along the top of the page.
- Follow the prompts to enroll in a Payment Plan that fits your needs. You can read more about Payment Plans at https://www.wright.edu/enrollment-services/accounts-and-bills/payment-op...
- Once you have completed your enrollment, a receipt will be sent to your WSU email account to confirm payment.
-
Log In as a Parent/Authorized User to Pay Fees
- Parents/Authorized Users log-in by going to the Enrollment Services (RaiderConnect) website clicking on the Student Accounts & Bills tab at the top, then clicking on the View and Pay Bill button under the Parents/Authorized Users tab at the right.
- In the box labeled Authorized Users, enter the parent/authorized user's e-mail address and the password that was sent by the RaiderConnect Office when the student set up the Authorized User.
- Next, authenticate yourself by entering your full name, a new password, confirm the password and establish a password hint that will help you remember your new password. If you do not remember your password, click on have a temporary password emailed to you or Password Hint.
- Click Save.
- To view a billing statement select eBills then View under Most Recent Billing Statement. To make a payment, select Pay.
- Click Make a Payment.
- Review the Account Payment screen to ensure the Amount due and the Payment Date are correct. Click inside the boxes if you want to change the amount or the payment date.
- Click Continue.
- Select a Payment Method and click on Select.
- If paying by Bank Account (Checking / Savings), select the Account Type.
- Enter the Routing Number.
- Enter the Account Number then enter the Account Number again to confirm.
- Enter the Name on the Account.
- If you wish, place a check mark in the Save the Payment Method for future use check box. Enter a name to save the method (ex. Betty’s checking account).
- Click Continue.
- Check the I Agree box and then click on Submit Payment. A receipt will be sent to your email account to confirm payment.
-
Print Receipts
- Log in to WINGS using your Campus 'w' username and password.
- Select the Student button under Your Launchpad.
- Under the Student Fees section, click Student Account Center.
- Expand the drop down menu under My Account, and select Account Activity.
- Select the drop down arrow next to the term for which you want to view/print receipts.
- Click Print.
Note: This information is also available by printing off monthly e-bill statements.
-
Set Up Direct Deposit
- Log in to WINGS using your Campus 'w' username and password.
- Select the Student button under Your Launchpad.
- Under the Student Fees section, click Student Account Center.
- Expand the drop down menu under My Profile, and select Electronic Refunds.
- If you haven't already, you will be prompted to enroll in Two-Step Verification before setting up your direct deposit information.
- Under the Direct Deposit section, select Set up a new account.
- Select an Account Type from the drop-down list.
- Enter the Routing Number.
- Enter the Account Number.
- Enter the Account Number again to confirm.
- Enter the Name on the account.
- Enter a Name for this saved payment method (ex. Betty’s Checking Account). You can name this account in the Save Payment Method As box
- Click on Continue.
- Check the I Agree box and click on Continue.
-
Set Up an Alternate Email Address
- Log in to WINGS using your Campus 'w' username and password.
- Select the Student button under Your Launchpad.
- Under the Student Fees section, click Student Account Center.
- Expand the drop down menu under My Profile, and select Personal Profile.
- Enter an email address in the Secondary email address field and click the Save Changes button.
Note: The alternate email address ONLY applies to your Student Account statement. ALL other WSU communications will be sent to your campus email account.
-
View Bills and Pay Student Fees
To View Bills:
- Log in to WINGS using your Campus 'w' username and password.
- Select the Student button under Your Launchpad.
- Under the Student Fees section, click Student Account Center.
- Under Statements, select whether you want to view the On Demand Statement, latest eBill Statement, and/or latest 1098-T Tax statement.
To make a payment:
- Log in to WINGS using your Campus 'w' username and password.
- Select the Student button under Your Launchpad.
- Under the Student Fees section, click Student Account Center.
- Select Make Payment button on the banner along the top of the page.
- Follow the prompts for the Amount, Method, Confirmation, and Receipt portions under Account Payment.
-
View IRS 1098-T Notification
- Log in to WINGS using your Campus 'w' username and password.
- Select the Student button under Your Launchpad.
- Under the Student Fees section, click Student Account Center.
- Under Statements, select latest 1098-T Tax statement.
- Find the relevant Tax Year, and click View
-
Student Proxy Access
- Visit wright.edu/proxy
- Login with the email and password you registered with.
For more information about Student Proxy Access including how to set up a Proxy and FAQs, visit https://www.wright.edu/raider-connect/proxy.
Classes and Grades
-
Class Search
- Log in to WINGS using your Campus "w" username and password.
- Select the Student Academics button under Your Launchpad.
- Click on Course Registration in the menu on the left.
- Select Browse Classes.
- Select the term for which you want to see available classes, and click Continue.
- Enter the Subject, Course Number, Campus and click Search. Additional search criteria can be used including those available by expanding Advanced Search.
Pro Tip! Use the % sign as a wildcard at the end of your course number to return labs, clinicals, recitations, or other co-requisites that share the course number. - Course information will be listed matching the criteria you provided.Click the Search Again button at the top right of the screen to search for additional courses.
-
Register for Classes
- Log in to WINGS using your Campus "w" username and password.
- Select the Student Academics button under Your Launchpad.
- Click on Course Registration in the menu on the left.
- Select Register for Classes.
- Select the term for which you want to see available classes, and click Continue.You may receive notification(s) regarding holds on your account, etc that may need to be resolved before you can continue.
- Enter a combination of the course Subject, Course Number, Campus, Level, Part of Term, and Attribute (Delivery Method) and click Search; or click Advanced Search for more specific options.
- Course information will be listed matching the criteria you provided.
- To register for a course, click Add next to the desired course; you should now see the course listed under Summary on the bottom right of your screen.
- To finish registering, click Submit in the bottom right corner of your screen.
- Click the Search Again button at the top right of the screen to search and register for additional courses.
Note: Co-req courses MUST be taken together. For example: lab and lecture or a writing intensive course and its writing component. You can find information about meeting times, restrictions, or required corequisites by clicking on the course title in your summary and selecting that category in the details window.
-
View Class Schedule
- Log in to WINGS using your Campus "w" username and password.
- Select the Student Academics button under Your Launchpad.
- Click on Course Registration in the menu on the left.
- Select View Registration Information.
- In the Look up a Schedule tab, select a current/past term to view your registered classes.
Note: Click on the course title to see more class details.
-
View Grades
- Log in to WINGS using your Campus "w" username and password.
- Select the Student Academics button under Your Launchpad.
- Click on View Grades in the menu on the left.
- Select a Term and Course Level using the dropdown boxes; your grades should then auto-populate for the specific term information you entered.
-
Add or Drop Classes
Add Classes
- Log in to WINGS using your Campus "w" username and password.
- Select the Student Academics button under Your Launchpad.
- Click on Course Registration in the menu on the left.
- Select Register for Classes.
- Select the term for which you want to see available classes, and click Continue.You may receive notification(s) regarding holds on your account, etc that may need to be resolved before you can continue.
- Enter a combination of the course Subject, Course Number, Campus, Level, Part of Term, and Attribute (Delivery Method) and click Search; or click Advanced Search for more specific options.
- Course information will be listed matching the criteria you provided.
- To register for a course, click Add next to the desired course; you should now see the course listed under Summary on the bottom right of your screen.
- To finish registering, click Submit in the bottom right corner of your screen.
- Click the Search Again button at the top right of the screen to search and register for additional courses.
Dropping Classes
Always consult with your Advisor or Enrollment Services to make sure you understand financial aid implications or how your planned graduation date might be affected before you drop courses.
- Log in to WINGS using your Campus "w" username and password.
- Select the Student Academics button under Your Launchpad.
- Click on Course Registration in the menu on the left.
- Select Register for Classes.
- Select the current term, and click Continue. You will see your Summary towards the bottom right corner of your screen. Find the class you want to drop, and select the dropdown arrow under the Action column. Select Web Drop/Delete.
- To submit your changes, click Submit in the bottom right corner of your screen.
-
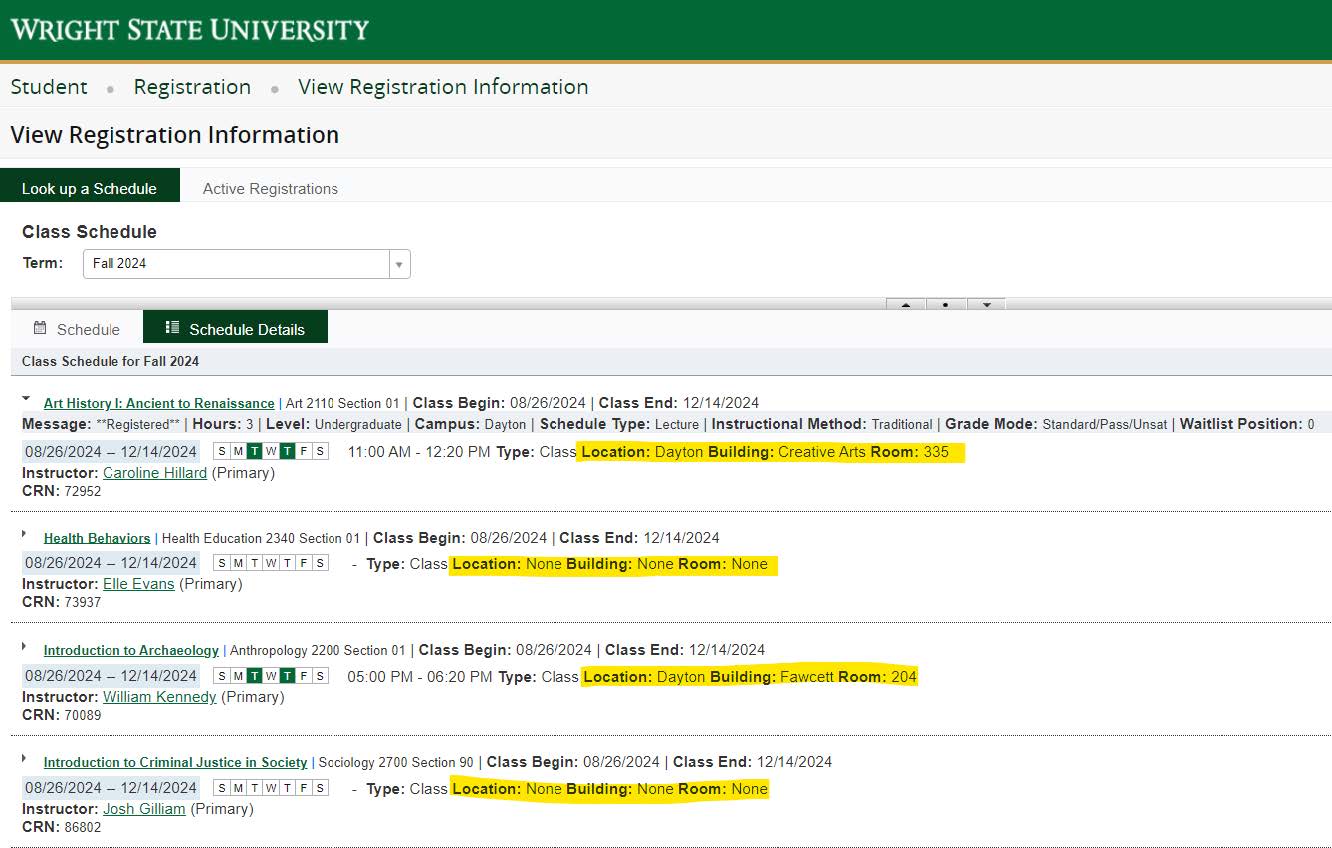
Find My Classes
Follow these steps in WINGS to view your current schedule and to find the rooms/buildings for your classes.
Pro Tip! Be sure to check your class schedule before heading to classes during the first week. Classroom and building assignments can be adjusted at the last minute if needed.
All campus buildings have a two- or three-digit code for the name. Example: University Hall is UH.
Find your buildings on the Campus Map. You can download and print a map if you wish.
-
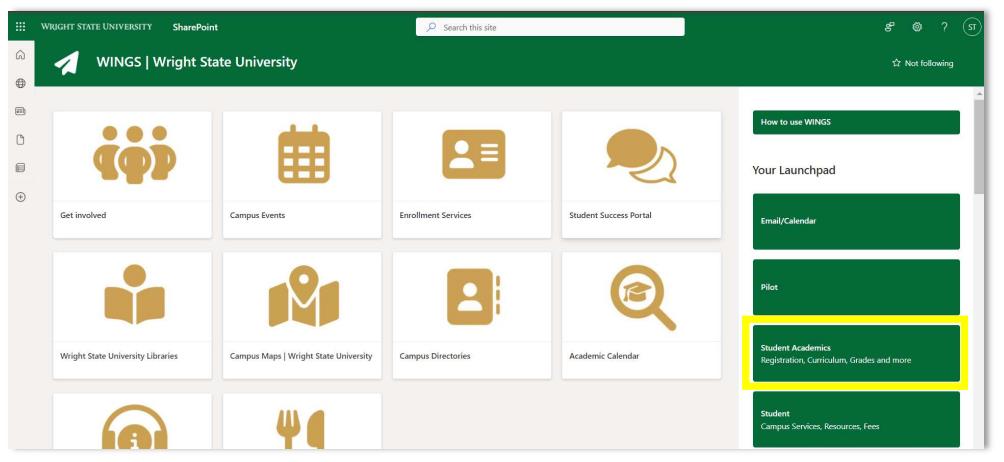
Login to the WINGS portal and click the Student Academics tile.
-
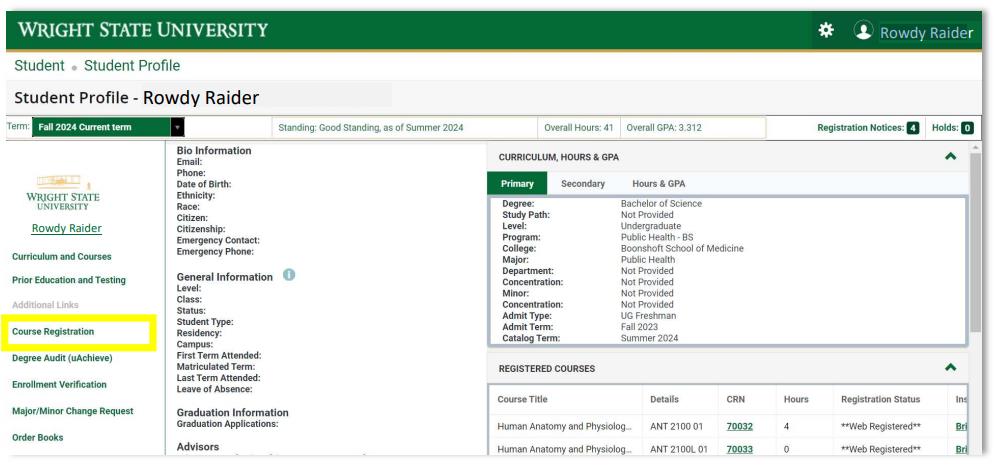
Select Course Registration from the left pane on your Student Profile.
-
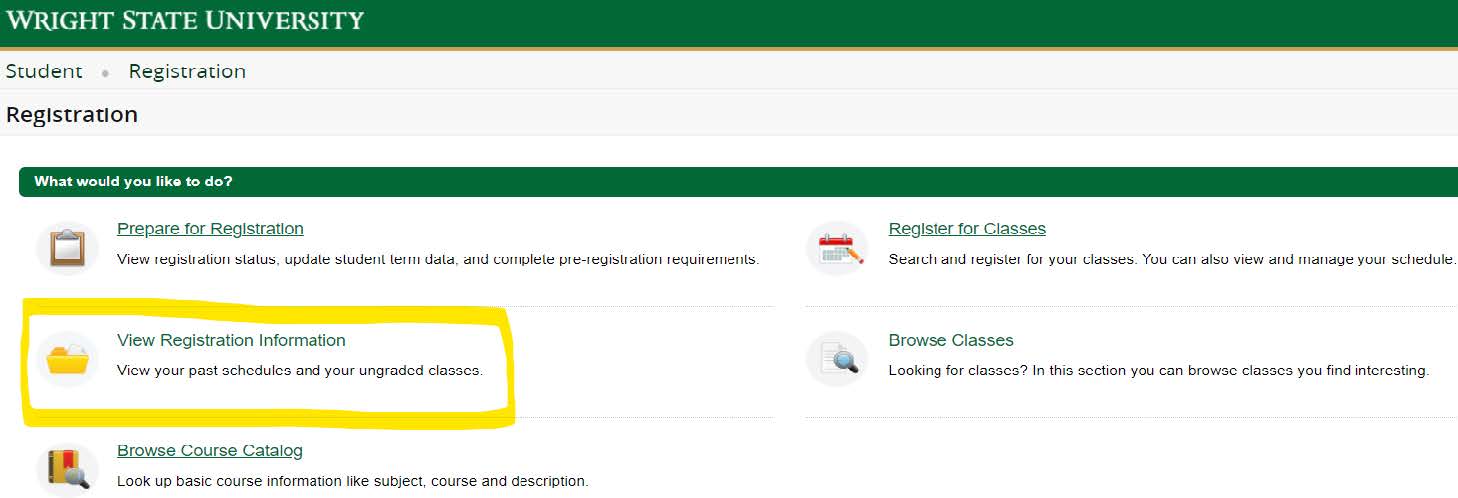
Choose View Registration Information.
-
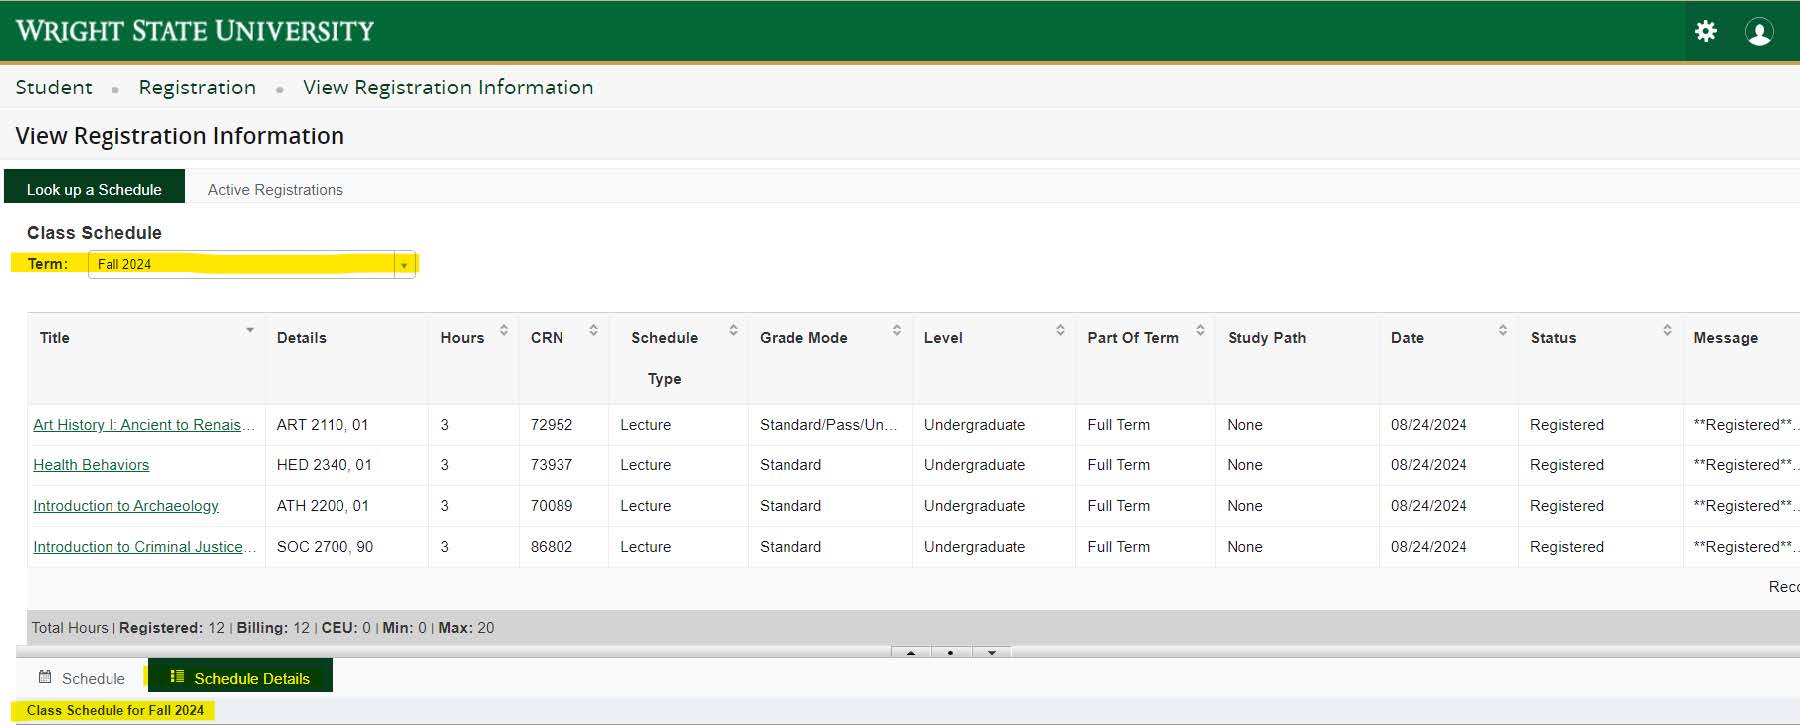
Make sure you are on the correct Term and then click on Schedule Details.
-
Your class buildings/rooms will be listed in the Schedule Details. If there is no building or room assigned, it may be an online class. Log into Pilot (WSU’s learning management system) to see the details of your class.
-
uAchieve
-
What's uAchieve?
uAchieve is an advising tool used university wide for undergraduates and certain grad student programs. uAchieve reports assist students in keeping on track for degree progress, allowing them to view their academic work and how it has applied to their degree programs.
Questions? Contact the uAchieve team.
-
How to Run a Degree Audit Report
- Log into WINGS using your campus 'w' username and password.
- Click on Student Academics under Your Launchpad.
- Select Degree Audit (uAchieve) from the menu on the left.
- Click the Request Audit button.
- Choose the Run Declared Programs option, and then click Run Declared Programs.
- Your audit should automatically load once it's ready. If you have multiple programs declared, you will need to select the View Audit option under the View column, next to the desired report.
Select a What-if degree:
- Choose the Select a What-if Audit option.
- Use the drop down menus to select your desired college, program, and year.
- Click Run Different Program.
- Your audit should automatically load once it's ready.
-
Declared Programs
Declared programs are programs that your advisor has added into uAchieve. If you do not see a declared program, email your advisor and request they add one for you.
Your advisor will review the program you have declared, check for Advance Placement credit, and transfer work. Your advisor may also substitute or waive coursework.
If you have a Declared Program assigned, click Run a Declared Program.
Faculty
Workflow
-
Obtaining Workflow Access
To obtain Workflow access, submit a ServiceNow request.
-
How to Access the Workflow Application
- Login to WINGS with your campus username and password.
- Click the Banner Workflow link under Workflow Services. If prompted, sign in again with your campus username and password.
-
How to Assign a Proxy to Your Workflow Account
To learn how to assign a proxy to your workflow account, follow the steps below:
- Login to WINGS with your campus username and password.
- Find the SCT Workflow Worklist channel.
- Click on the Open Workflow link. You will be taken to the Workflow application.
- Click the User Information link on the left.
- Look for the role for which you would like to assign a proxy then click the Add Proxy link on the right.
- Select the username of your proxy from the User drop down list.
- Next, set Effective From and Effective To dates.
- Place a checkmark in both the Confidential and Non-Confidential boxes.
- Click the Save button.
-
Releasing a Workflow Task
To learn how to release a task from your workflow, follow the steps below.
- Login to WINGS with your campus username and password.
- Find the SCT Workflow Worklist channel.
- Look for an item on the list that has a status of Performing.
- Click the magnifying glass icon to the right of the task.
- Verify that the task shown is the one you want to release back into the workflow.
- Click the Release button. You’ll be taken back to the Workflow Worklist, where the item you just released should now have a status of Ready.
-
What to Do When a Task Arrives in Your Worklist
These are general instructions for task management in your worklist.
- Log in to WINGS and go to your SCT Workflow Worklist Channel.
- Click on the task. The appropriate request form will appear.
- Fill out appropriate fields on the form.
- Scroll to the bottom to view notes and attachments.
- Take an action on the form (Review, Approve, Reject, etc).
Registrar
-
Faculty Input Final Grades
- Log into WINGS.
- Select the Faculty and Advisor button under Your Launchpad.
- Select Grade Entry from the Faculty menu. Grade Entry includes Midterm and Final Grades.
- Select the tab for either Midterm or Final Grades.
Optional: You can enter the term or CRN in the search to consolidate the list to the course(s) you want to see. - Click on the row of the course that you want to enter grades. The grade roster for your course will appear below the list of courses.
- When grading for the course is open, you will see a drop down to select the grade next to the student’s UID for either midterm grade entry or final grade entry.
- You can sort the roster using the arrows to the left of the column headings. You can also search.
- You can reset the page or save your entries using the buttons at the bottom right of the screen.
- Once you have entered all the grades and saved the worksheet, you will get a notification that grading for your CRN is completed.
- You can update your entries until the grade is rolled (usually overnight) OR until grading closes.
- After the grade has rolled, it can only be changed by submitting a grade change using the grade change workflow. (It can be found using the Grade Summary function.)
-
Faculty Registration Override
- Log into WINGS
- Select the Faculty and Advisor button under Your Launchpad.
- Select the NEW Faculty Services button under the Specialized Services heading.
- Click Registration Overrides.
- Select the appropriate Term from the drop-down list.
- Enter the student or advisee's UID, or search by Last/First Name.
- Click the Submit button.
- Select the Override type from the drop-down list.
- Select the appropriate course for the override. Note: You can only override courses you are scheduled to teach.
- When finished, click the Submit button.
-
Faculty View Summary Class List
- Log into WINGS
- Select the Faculty and Advisor button under Your Launchpad.
- Select the Summary Class List link under the Academics heading.
- Select the appropriate Term from the drop-down list.
- Select the CRN of the course you wish to view from the drop-down list.
- Click the Submit button.
-
Faculty Detail Schedule
- Log into WINGS.
- Click the Faculty and Advisor button under Your Launchpad. Then click Detail Schedule.
- Select the CRN that you want to view.
- In the top pane, you will see Course Information. There is a link to the Class List.
- Class List shows student information and also provides a link to their student profile.
- There is a separate list for Wait Listed students with the same details.
- There is a search window for the Class List as well as an email feature.
- The information is also able to be exported or printed.
- In the next section, you will see Scheduled Meeting Times for the course.
- In the third section, you can find enrollment information for the course including Wait List and Cross List enrollment if there are any for your course.
Employee
-
Banner Data Standards Manual
-
Labor Redistribution
Labor Redistribution is a module that allows you to manage payroll charges.Please contact the CaTS Help Desk at 937-775-4827 with questions regarding Labor Redistribution
-
How to Set Up a Proxy
How to set up a proxy user to approve time sheets or leave reports in your absence.
- Log in to WINGS
- Click on the Employee button under Your Launchpad.
- Click on either Time Sheet or Leave Report.
- Click the Proxy Set Up link.
- In the drop down box that appears, select the name of the person you wish to designate as the proxy.
- Click the box under Add.
- Click Save.
Staff
Banner
-
Banner Data Standards Manual
Workflow
-
Obtaining Workflow Access
To obtain Workflow access, submit a ServiceNow request.
-
How to Access the Workflow Application
- Login to WINGS with your campus username and password.
- Click the Banner Workflow link under Workflow Services. If prompted, sign in again with your campus username and password.
-
How to Assign a Proxy to Your Workflow Account
To learn how to assign a proxy to your workflow account, follow the steps below:
- Login to WINGS with your campus username and password.
- Find the SCT Workflow Worklist channel.
- Click on the Open Workflow link. You will be taken to the Workflow application.
- Click the User Information link on the left.
- Look for the role for which you would like to assign a proxy then click the Add Proxy link on the right.
- Select the username of your proxy from the User drop down list.
- Next, set Effective From and Effective To dates.
- Place a checkmark in both the Confidential and Non-Confidential boxes.
- Click the Save button.
-
Releasing a Workflow Task
To learn how to release a task from your workflow, follow the steps below.
- Login to WINGS with your campus username and password.
- Find the SCT Workflow Worklist channel.
- Look for an item on the list that has a status of Performing.
- Click the magnifying glass icon to the right of the task.
- Verify that the task shown is the one you want to release back into the workflow.
- Click the Release button. You’ll be taken back to the Workflow Worklist, where the item you just released should now have a status of Ready.
-
What to Do When a Task Arrives in Your Worklist
These are general instructions for task management in your worklist.
- Log in to WINGS and go to your SCT Workflow Worklist Channel.
- Click on the task. The appropriate request form will appear.
- Fill out appropriate fields on the form.
- Scroll to the bottom to view notes and attachments.
- Take an action on the form (Review, Approve, Reject, etc).
Employee
-
Banner Data Standards Manual
-
Labor Redistribution
Labor Redistribution is a module that allows you to manage payroll charges.Please contact the CaTS Help Desk at 937-775-4827 with questions regarding Labor Redistribution
-
How to Set Up a Proxy
How to set up a proxy user to approve time sheets or leave reports in your absence.
- Log in to WINGS
- Click on the Employee button under Your Launchpad.
- Click on either Time Sheet or Leave Report.
- Click the Proxy Set Up link.
- In the drop down box that appears, select the name of the person you wish to designate as the proxy.
- Click the box under Add.
- Click Save.