Chrome River Help Guides
Chrome River is Wright State University's expense management system for Procard expenses and university employee travel and reimbursement. View the Chrome River Overview (PDF) to learn more about the benefits for Wright State.
Instructions for using the Chrome River application are available within the Chrome River application and using the links below. Please note that you must log in to Chrome River via single sign on to link to the help topics.
Chrome River help topics apply to a generalized version of the application. Chrome River for Wright State University may use different features, have a different appearance, or require institution-specific actions. Where significant variations occur or additional instructions are needed, supplemental information is provided in the links below.
|
Chrome River Help Topic |
Wright State Additional Instructions and Guidelines |
|
|---|---|---|
|
Quick start |
|
|
|
|
||
|
|
||
|
|
|
|
|
|
|
|
|
Pre-approval |
|
|
|
|
||
|
|
|
|
|
|
|
|
|
|
|
|
|
|
||
|
Expense |
|
|
|
|
||
|
|
||
|
|
||
|
|
||
|
|
|
|
|
|
|
|
|
|
||
|
|
|
|
|
|
|
|
|
|
|
|
|
|
Prepaid (pro-card) travel expenses |
|
|
|
|
|
|
|
|
|
|
|
|
|
|
|
|
|
|
|
Expense report approval instructions and guidelines |
|
|
|
|
|
|
Glossary |
|
|
| Printable Quick Guides | How to assign a delegate (PDF) How to approve a report (PDF) Submitting Images and Receipts to Chrome River (PDF) |
|
| Chrome River Work Flows | Overview - Chrome River - JP Morgan - Banner Integration (PDF) Document Flow - Chrome River - JP Morgan - Banner (PDF) Travel pre-approval report workflow (PDF) Travel expense report workflow (PDF) Travel-related procard purchases (PDF) Procard (non-travel) expense report workflow (PDF) |
Additional Instructions and Guidelines
Getting Started
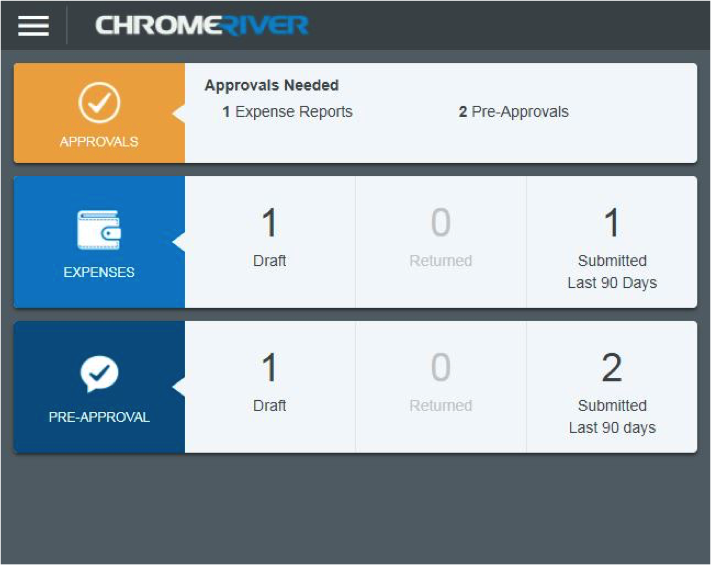
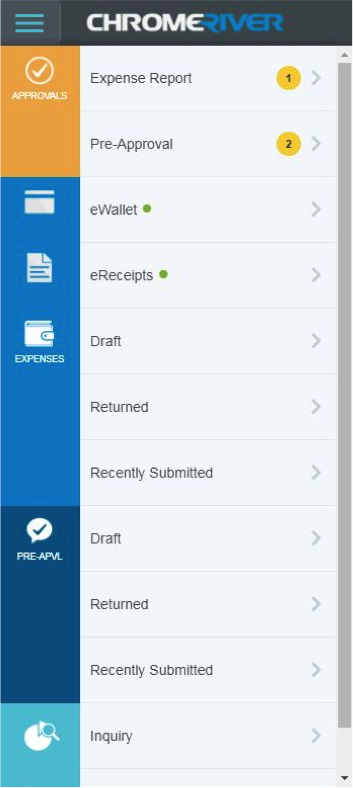
Chrome River for Wright State View
Chrome River for Wright State includes a dashboard ribbon and menu items for Pre-Approvals.
Add Alternative Email
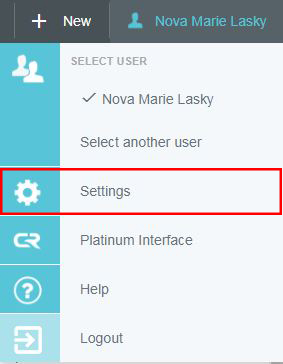
Your Wright State University email address is the primary email address associated with your Chrome River account. Users can add alternative email addresses to receive Chrome River notifications and from which emails can be sent directly to their Chrome River E-Wallet. To add alternative emails, tap on the user menu and select Settings.
Select the Personal Settings menu. Account Information will display including the email addresses associated with the user's account. Tap the Add Alternative Emails button.
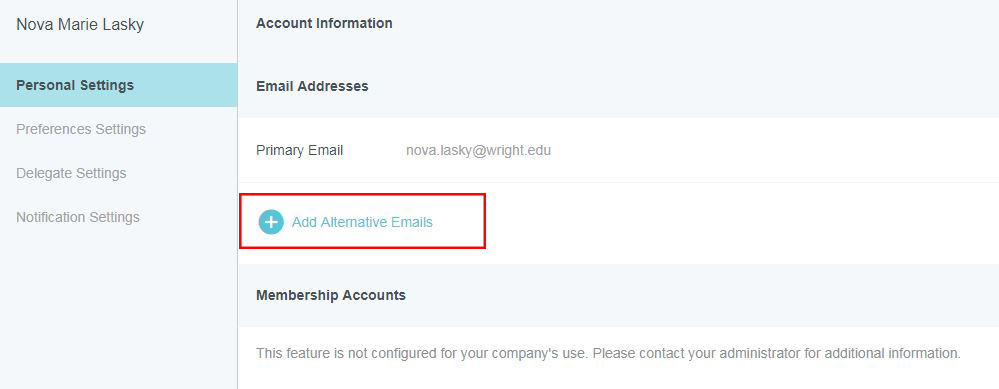
A field will appear to enter the alternative email. Enter the address and tap Add. To add multiple email addresses, repeat this step for each address.

Pre-Approval Instructions and Guidelines
Mandatory Pre-Approval for Travel
Pre-approvals are required for all overnight travel. The application will not allow a travel expense report to be submitted without an approved pre-approval.
Pre-Approval Report Header Fields
Chrome River for Wright State requires the following fields to be completed for the Pre-Approval report header:
- Report Name: A brief title describing your travel (e.g., 2017 Higher Education Conference, 2017 Local Mileage). (In Banner, 10 characters of the user name and 24 characters of the report name will appear)
- Travel Start Date/Travel End Date: These are the inclusive dates of your travel (includes days of non-business travel) and must span more than one day.
- Business Purpose: Describe the business purpose of your trip. Check with your business manager for specific details to include.
- Report Type: Most employees will select Domestic (US) or International based on destination cities. Athletic coaches will select the Athletic report type. Pre-Approvals with the report type International Travel will be reported to the University Center for International Education for information purposes only.
- Includes Non-Business Travel: Check box only if adding additional days to your travel that do not have a university business purpose and are not reimbursable by the university.
- # Non Business Travel Days: Enter number of non-business travel days. If not applicable, leave amount as 0.
- City: Enter destination city (this field does not generate a drop down list, please be careful with spelling). If traveling to multiple cities, use the one where the majority of the trip will be concentrated.
- State: Select destination state from drop down-menu. For international travel, select No State.
- Country: Select country from drop-down menu.
- Allocations: The first allocation field is for the selection of your Fund-Org-Program. Begin typing the organization code or title to narrow the pick list. If unsure of the appropriate allocation, please check with your unit’s business manager. Two additional allocation fields will appear. First, select the appropriate travel account (746XXX), then select an activity code in the final allocation field. If you do not have an activity, choose 0-No Activity. If expenses will be split between more than one Fund-Org-Program, click + Add Allocation. Assign a percentage of expenses to be allocated to each.
Required Documents (Travel Pre-Approval)
Conference registration/information must be attached to the preapproval.
Estimating Per Diem
Per Diem Wizard is not available in Chrome River for Wright State. Meal expenses should be estimated using the per diem rates and rules listed in University Policy.
Non-Reimbursable Personal Expenses
If non-reimbursable personal expenses are known at the time of pre-approval (e.g., upgrades, non-reimbursable conference add-ons, etc.), note those in the description field of the appropriate expense type, but do not include the amounts in your pre-approval request. This will prevent funds from being encumbered for non-reimbursable personal expenses.
Manually Selecting Approvers
Report creators will manually select an approver for each allocation indicated on the pre-approval. In most cases, this will be the expense owner’s direct supervisor. If unsure of the approver, please check with your business manager. Approvers may be repeated for multiple allocations.
Applying Expenses to a Pre-Approval
All overnight travel expense reports must have an approved pre-approval report attached to be submitted.
Pre-Approvals will disappear from the dashboard ribbon after 90 days, but will still be available to attach. Pre-Approvals must be attached and submitted with the appropriate expense report within 90 days of the travel dates. After 90 days, the Pre-Approval will no longer be available and funds will be disencumbered.
Pre-Approval Review and Approval
Pre-Approval Encumbrance
Following approval, estimated amounts will be encumbered. The amounts will be disencumbered as expense reports are applied. When the final expense report for the pre-approval is submitted and approved, the full amount of the pre-approval estimated expenses will be disencumbered. Encumbrances will also be liquidated if the Pre-Approval is deleted or if any unapplied amounts remain 90 days past the approved travel dates.
Approving/Returning Pre-Approvals
Approvers cannot edit estimated expenses or reject by line item in the Pre-Approval report. If any part of the Pre-Approval requires adjustment, return the report to the creator with comments on required changes.
Multiple Allocations
For pre-approvals with more than one allocation (FOAPL) applied, business managers will be able to view the full report and see which estimated expenses will be charged to their FOAPL.
Reports with Foundation accounts will also be routed to the Foundation office for approval. Reports associated with a grant will also be routed to Research and Sponsored Programs for approval.
Viewing Images
Images can be viewed by scrolling to the bottom of the preview page and tapping on the image thumbnail.
Expense Report Instructions and Guidelines
Report Name
A portion of the Report Name field feeds into Banner and will display on journal vouchers (TJ######) and can serve as an identifier for expense reconciliation. The field will display the first 10 characters of the expense owner’s name and the first 24 characters of the Report Name field. Please check with your unit business manager for preferred naming conventions. The full report name will display on the invoice issued for expense reimbursement (IR######).
Report Type
Wright State currently uses four expense report types:
- Athletics: Used for recruiting activities and follows a modified workflow for NCAA compliance checks
- Domestic Travel and Local Mileage: Any in-country travel not associated with athletic recruiting. Local mileage should be submitted by month and is the only travel expense that does not require a Pre-Approval report.
- International Travel: Any out-of-country travel.
- Non Travel: Pro-card purchases.
Non-Reimbursable Expenses
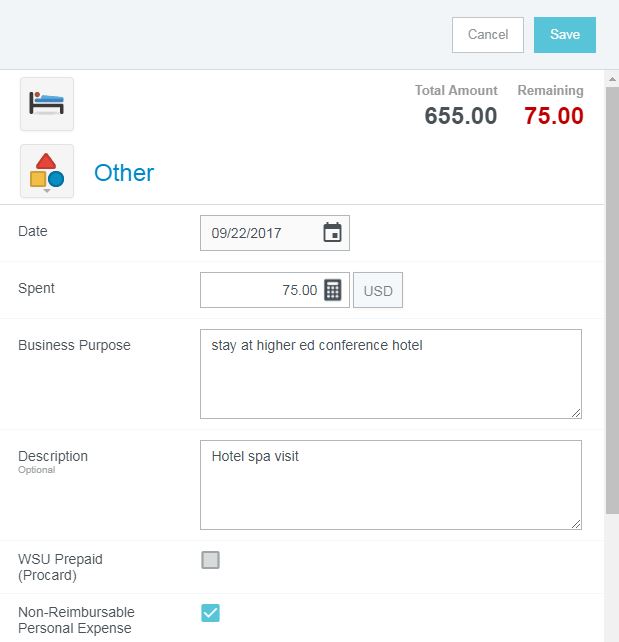
When a purchase is made that is not a reimbursable expense, but is included on the receipt/documentation with reimbursable expenses, the item should be noted and marked as a non-reimbursable expense. For non-reimbursable expenses related to a hotel stay (e.g., food, beverage, entertainment), the expense can be itemized within the hotel expense and individually marked as non-reimbursable. For other expense types, the reimbursable and non-reimbursable portions should be two separate entries with an explanation in the description field (e.g., upgrades, additional stops, etc.)
Required Documents
Documentation is required for all expenses with the exception of ground travel (mileage) and meals reimbursed at the per diem rate. Full conference agendas should be provided and receipts should be itemized when applicable.
Credits to Hotel Folio
If a credit is applied to a hotel expense paid on a university procard (e.g., refund of sales tax paid), the credit should be added under the Other expense tile, under the subcategory Miscellaneous-Other. Chrome River does not allow negative amount submission on the hotel folio itemization.
Monthly Local Travel Expense
Local Travel
Local travel expenses (i.e., mileage, parking, etc.) should be submitted at the end of each month as one expense report for all local travel incurred in that month. A Pre-Approval report is not required for local travel reimbursement. Chrome River is programmed to use the current IRS mileage reimbursement rate.
Each day of travel should be logged as an individual expense item within the report. Multiple destinations can be entered for each day.
Commuting Miles Deduction
When your normal commute to and from the University does not occur as part of your daily travel, normal commute miles must be deducted from the total. Enter the total miles to deduct (typical commute to and/or from your home to the University) in the Deduction field using the Distance deduction type.
Per Diem Guidelines
Per Diem
Chrome River for WSU is programmed with our institutional per diem reimbursement rates (location-specific). Please remember that any meals not qualified for per diem (provided at conference, paid by another party, etc.) should be checked under the Deductibles section of the daily per diem.
Meals qualifying for per diem reimbursement do not require an attached receipt.
*Tip – when searching for location in the per diem tile, it may be easiest to start with the state abbreviation in parentheses (e.g., (OH)), then type the city.
Missing Receipts
For expense items less than or equal to $5 where the expense receipt is missing, the explanation for the missing receipt should be recorded in compliance warning response window. Do not attach memos or other images to the expense item.
Prepaid (Pro-card) Travel expenses
Pre-Paid Travel Expenses
Travel Expenses paid with a University Procard will be treated differently dependent upon whether the purchaser and traveler are the same person.
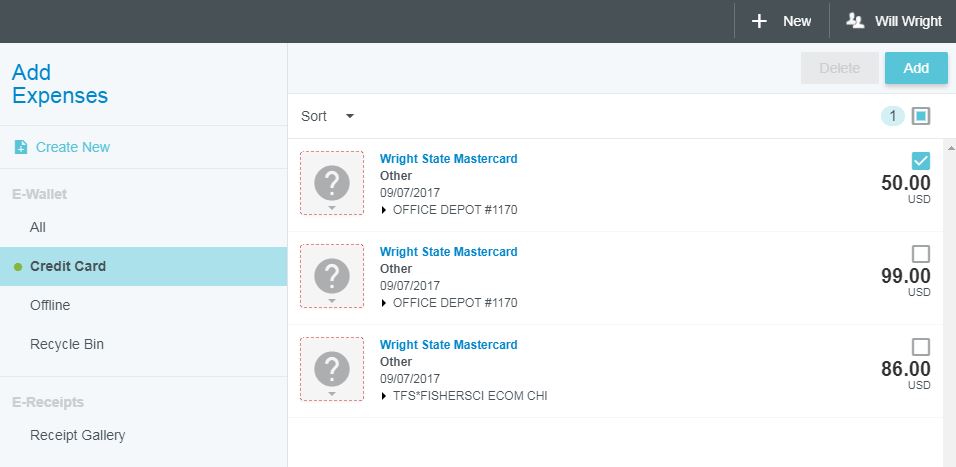
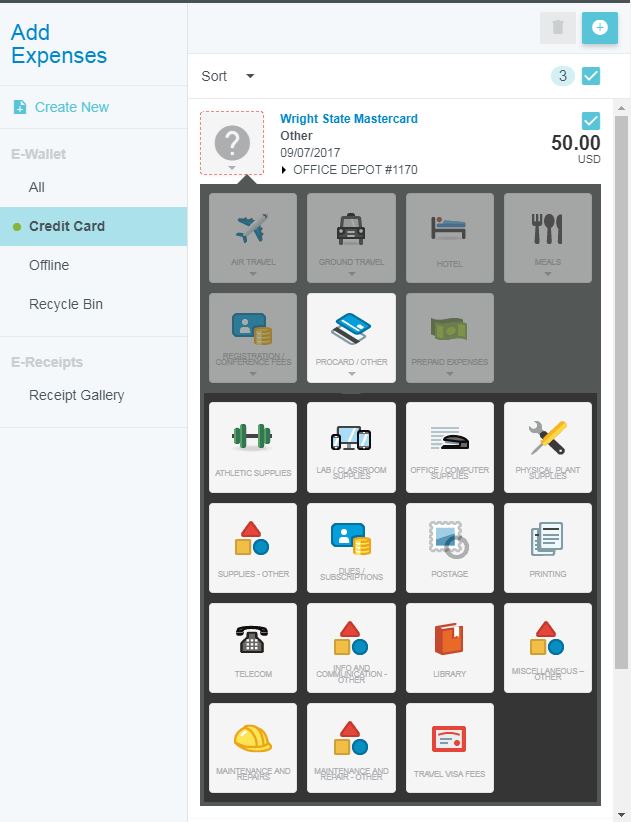
If the traveler incurred the expense on their own procard, the charged should be attached to the travel expense report directly. In the travel expense report, credit card expenses can be accessed through the Add Expenses pane by selecting Credit Card from the eWallet list.
Identify the appropriate expense to be applied, check the box over the purchase amount, and tap the Add button at the top (may appear as a + button on smaller screens).
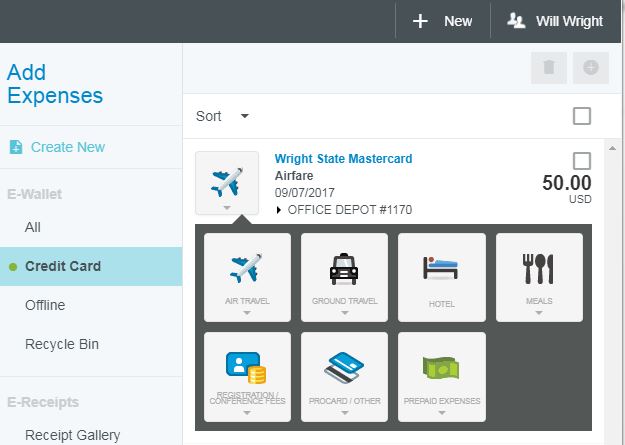
Expense Type can be assigned before or after adding the expense. To add before, tap the question mark box to the left of the expense description and select the appropriate expense type.
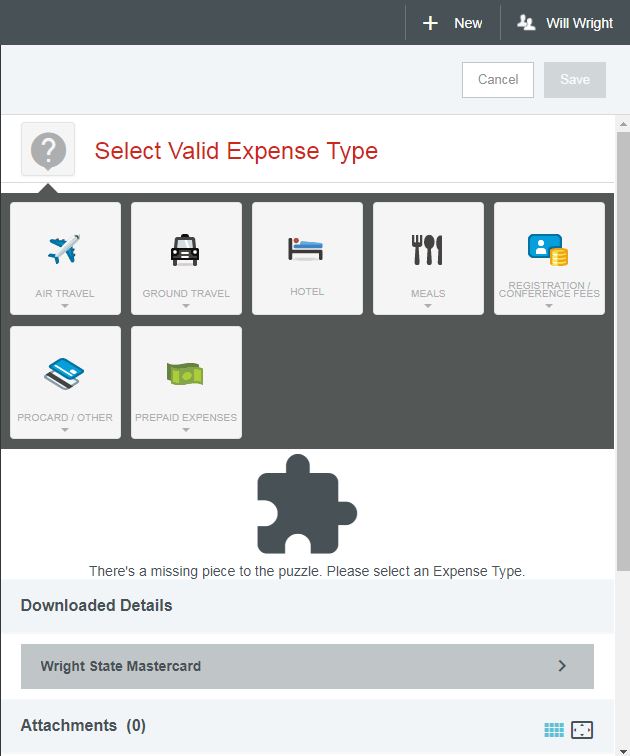
If adding after, the Select Valid Expense Type pane will appear and the normal procedure for documenting expenses will be followed.
If the purchase was made on a pro-card owned by someone other than the traveler, the expense will need to be reported on both the credit card expense report of the purchaser and the travel expense report of the traveler.
For the purchaser, the expense will not require a pre-approval (this is done through the traveler’s Pre-Approval report) and will be submitted using the same procedure as all procard expenses. The traveler name should be indicated in the description field of the expense.
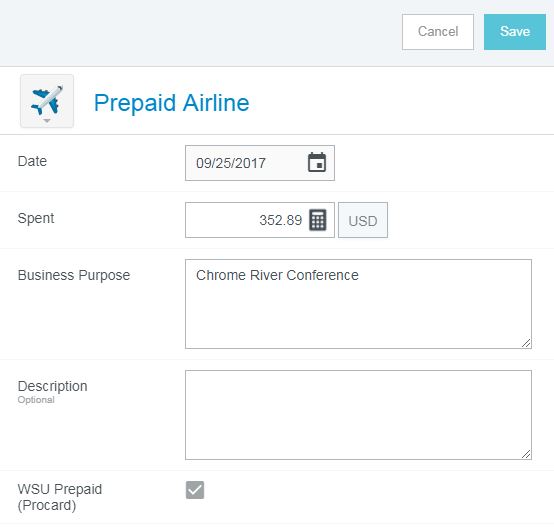
The traveler will record the pre-paid expense by selecting the Prepaid Expenses tile and the appropriate sub-expense category tile.
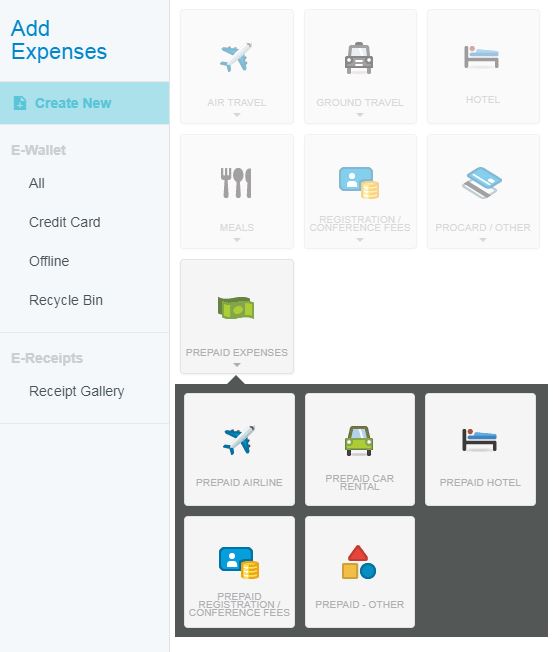
In the expense detail pane, the WSU Prepaid (Procard) box should be checked. Receipt images are required for pre-paid expenses.
If a pro-card purchase is made for a travel-related expense that covers multiple travelers (e.g, airline tickets, hotel rooms, shuttle service, etc.), the expense owner should record the expense on a non-travel expense report under the appropriate travel expense type. The travelers should each record their portion of the expense as a pre-paid expense on their respective travel expense reports.
Procard Expense Report Submission Deadlines
To align with month-end closing, all procard expense reports incurred by the 25th of the current month must be approved no later than the last day the month. To allow time for reports to move through approval workflows, reports should be submitted by the expense owner or delegate no later than the 25th of the month for expenses incurred since the previous reporting period.
Procard expense reports can be submitted for an entire month of purchases or split into several reports depending upon the preference of the department and/or employee, however, all expenses must be submitted by the deadlines outlined above. Best practice is to add the purchase information and documentation into the expense report within 20 days of the purchase.
Procard Expense Report Instructions and Guidelines
Report Header
The Report Name field should be completed in a manner to best identify the purchase time period being reported. A portion of the Report Name field feeds into Banner and will display on journal vouchers (TJ######) and can serve as an identifier for expense reconciliation. The field will display the first 10 characters of the expense owner’s name and the first 24 characters of the Report Name field. Please consult your unit business manager for preferred naming conventions.
The Report Type for all procard expense reports should be Non travel. The start and end dates should be inclusive of the purchase dates reported.
Expense Type
For each selected procard expense, the Procard/Other expense tile should be selected first, the then appropriate subcategory should be selected.
For travel-related expenses where the purchaser is not the traveler (e.g., purchased for another employee), the appropriate travel-related expense type should be selected (rather than procard/other) and the traveler name should be indicated in the description field of the expense.
When the appropriate expense type has been selected for each purchase, tap add and follow the general expense report guidelines.
Travel-Related Expenses
Expenses incurred for travel purposes will either be reported on the travel expense report only (traveler-purchased) or on both the procard and travel expense reports (purchased by someone other than the traveler). See PrePaid expenses for more detail.
If Traveler = Purchaser:
- Report on travel expense report
- Expense type is appropriate travel-type expense
If Traveler ≠ Purchaser:
- Purchaser reports on procard expense report under appropriate travel-type expense with traveler/business purpose info in description field
- Traveler reports on travel expense report under the appropriate pre-paid expense type with purchaser info in description.
If a pro-card purchase is made for a travel-related expense that covers multiple travelers (e.g, airline tickets, hotel rooms, shuttle service, etc.), the expense owner should record the expense on a non-travel expense report under the appropriate travel expense type. The travelers should each record their portion of the expense as a pre-paid expense on their respective travel expense reports.
Submitting a Non-Travel Report
When submitting the Expense Report, the Submit Confirmation will include the option to attach a pre-approval report. Pre-approvals should not be attached for Non-travel report types, the Expense report should be submitted directly.
Balance Owed to the University
In the event that a balance is owed to the university, the expense owner/traveler is required to reimburse the university within 60 days of the travel date, although best practice is to submit the expense report and remit payment immediately upon return from travel.
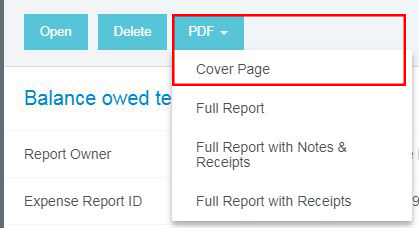
To remit payment, the traveler should send the report cover page with a check payable to Wright State University for the full amount due to their unit business manager.
The unit business manager (or other designated personnel) will complete a Cash Remittance Voucher using the allocation 102090-215220-113000 and send to the Bursar Office for processing.
The Bursar will return a copy of the Cash Remittance Voucher with proof of processing to the unit business manager. The business manager will scan and attach the Cash Remittance Voucher to the expense report in Chrome River and approve the report.
Expense Report Approval Instructions and Guidelines
Expense Approval Workflow
Report creators will manually select an approver for each allocation indicated on the pre-approval. In most cases, this will be the expense owner’s direct supervisor. If unsure of the approver, please check with your business manager. Approvers may be repeated for multiple allocations.
For expense reports with more than one allocation (FOAPL) applied, the business manager for each allocation will view/and approve expenses that will be charged to their FOAPL.
Reports with Foundation accounts will also be routed to the Foundation office for approval. Reports associated with a grant will also be routed to Research and Sponsored Programs for approval.
With the implementation of Chrome River for Wright State, Accounts Payable will no longer review approved travel expense reports prior to issuing payment. Approving supervisors and business managers acknowledge responsibility for approval at the time of submission and will be held accountable for verifying the accuracy and compliance of all charges.
Approver Adjustments to Expense Reports
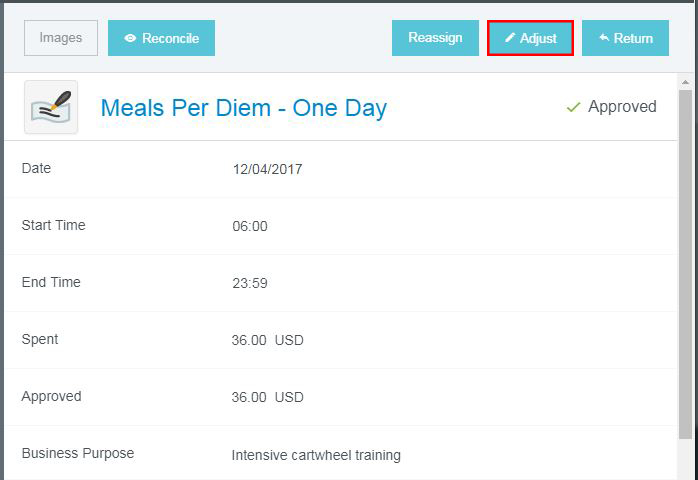
Approvers have the ability to make adjustments to approved amount, expense description, and allocation assignments for individual line items on a Travel Expense Report. To make adjustments, select and open the travel expense from your Approvals Needed menu. On the expenses pane, select the line item to be adjusted, then on the expense detail pane, tap Adjust.
Provide an explanation of the adjustment in the adjustment note dialogue box and leave Notify Expense Owner selected.
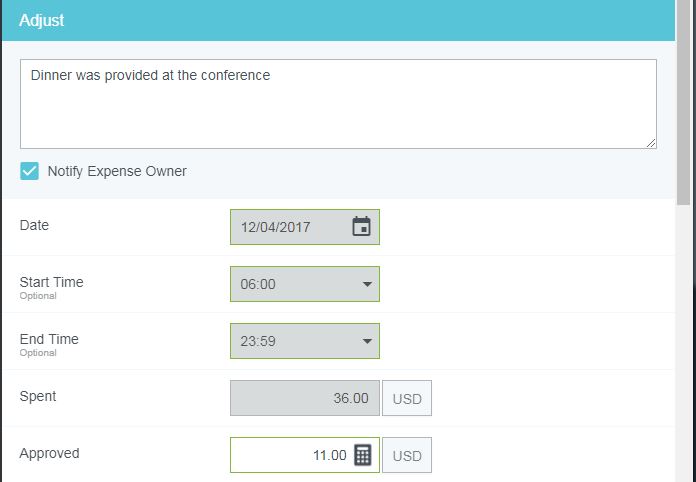
Enter approved amount adjustment, expense description edits, and/or allocation changes and tap Save.
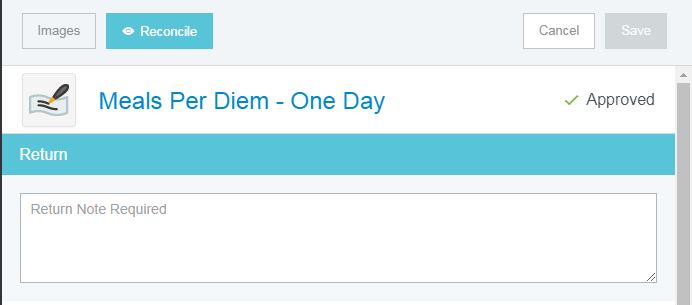
Approved amounts can only be reduced. If the traveler is owed more, the line item must be returned to the expense owner. To return individual expenses, select the appropriate expense and tap Return at the top of the expense detail pane. Then, provide an explanation in the Return Note dialogue box and tap Save.

NOTE: Adjustments cannot be made to Pre-Approval Reports. Pre-Approvals must be returned to the expense owner for correction.
Reassigning Reports
In the event someone receives an expense report for approval that should be reviewed and approved by a different employee, the expense report can be reassigned. Please note: by reassigning the report, the assignor relinquishes their approval authority for the report.
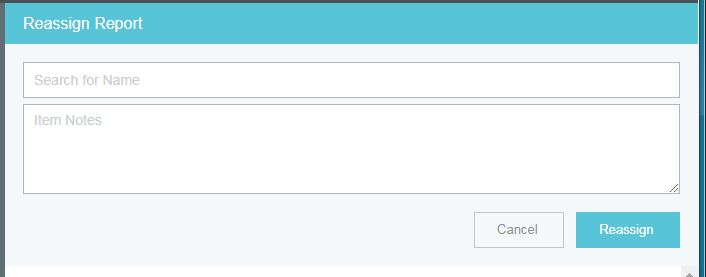
To reassign an expense report, select the appropriate report in the Approvals Needed pane and the report header page will appear. At the top of the report header, select the ellipses, then Reassign.

The Reassign Report dialogue box will appear. Click in the Search for Name field, and begin typing the name or search the full list using the scroll bar. Notes may also be added to explain why the report was reassigned.
Pre-Approval reports are not reassignable. If the Pre-Approval was received in error, it can be returned to the submitter with comments suggesting a different approver.