Tables
Tables should be used only for data that requires a tabular format, such as a list of contact information. Tables should not be used as a means to lay out document content; this may cause problems if non-visual media or data is placed in tables.
When should I use a table?
Tables should contain tabular data only:
| GRADUATION DATE | APPLICATION FILING PERIOD |
|---|---|
| August (Summer Quarter) | March 2 to May 25 |
| November (Fall Quarter) | May 26 to August 21 |
| March (Winter Quarter) | August 22 to December 7 |
| June (Spring Quarter) | December 7 to March 1 |
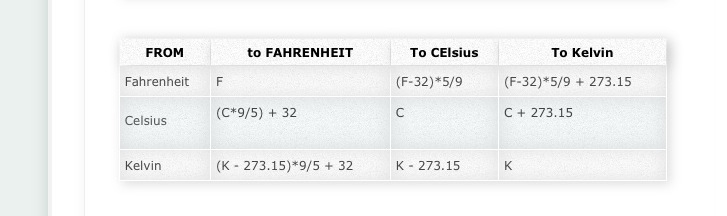
| FROM | TO FAHRENHEIT | TO CELSIUS | TO KELVIN |
|---|---|---|---|
| Fahrenheit | F | (F-32)*5/9 | (F-32)*5/9 + 273.15 |
|
Celsius |
(C*9/5) + 32 | C | C + 273.15 |
| Kelvin | (K - 273.15)*9/5 + 32 | K - 273.15 | K |
Tables should NOT be used to lay out page elements in the CMS:
| Logo image here | Banner image here |
| LINKS! | News goes here |
| MORE LINKS! | Pictures here |
| EVEN MORE LINKS! |
Content buried here |
On tables and accessibility
For Web visitors using screen readers, tables will be read beginning with the cell at the upper-left-hand corner of the table. That cell will be read in its entirety, and then the next cell to the right will be read. Be sure your information makes sense when read in this order. Otherwise, provide an alternative equivalent or reconsider whether this is an appropriate use of a table.
Use proper table headers (<th> in HTML) to identify a header or title for a table column or row. Screen reader users can repeat the column or row headings for any cell as they navigate through the table. Use the caption field (<caption> in HTML) to tell users what the content of the table actually represents. This may be read by a screen reader before the user dives into reading the table, but is also beneficial to sighted users, especially when the data represented in the table is complicated.
Creating tables
- Click the Table tool
- Select the number of Rows and Columns, header placement, table border size, alignment, table dimensions, etc.
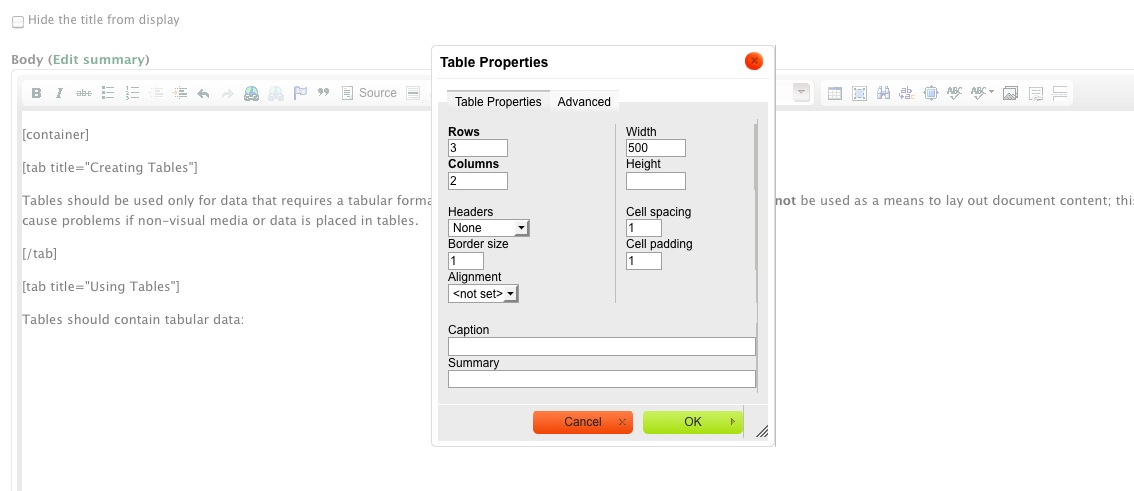
- Click "OK" to generate the table
- The table will appear with blank white cells; if headers were selected, the top row or first column will appear gray
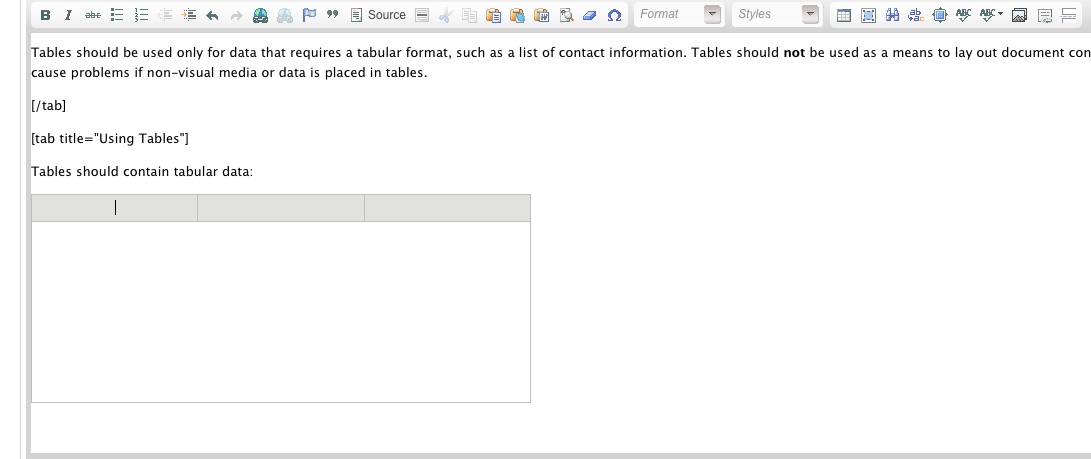
- Add data to each cell by clicking in the desired cell, and typing or pasting text.
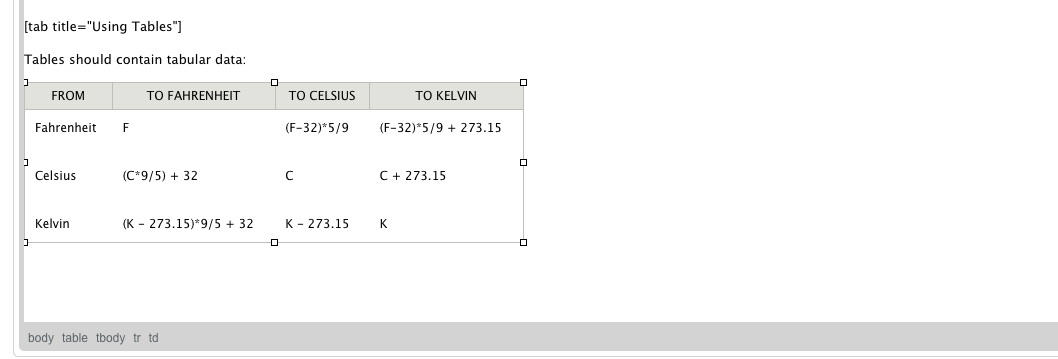
- To see your table fully formatted, save the draft of the page and view the entire page; most formatting elements are not added by the style sheet until the page has been saved.